
Effortlessly Managing Docker Containers: A Comprehensive Guide
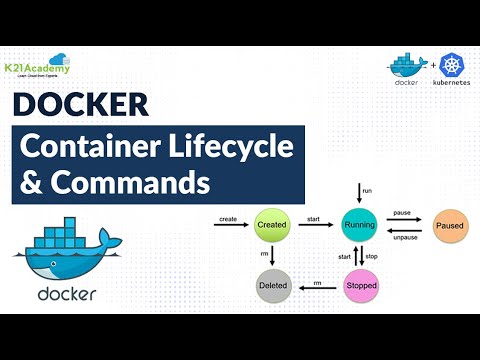
An Overview of Docker Container Lifecycle Management
Docker container lifecycle management is an essential aspect of working with Docker, ensuring that containers are properly handled, including stopping and removing them when necessary. This practice is crucial for maintaining a clean system, optimizing resource usage, and promoting efficient workflows. In this article, we will explore various techniques and best practices related to the “docker stop all containers and remove” concept, providing valuable insights for both beginners and experienced Docker users.
Gracefully Stopping Docker Containers
Stopping Docker containers in a controlled and orderly manner is crucial to ensure that processes within containers are given the opportunity to finish gracefully. The ‘docker stop’ command is designed to do just that. By default, it sends a SIGTERM signal to the container’s main process, allowing it to terminate gracefully within a 10-second timeout period. If the process does not terminate within this time frame, a SIGKILL signal is sent, abruptly halting the container. The basic syntax for the ‘docker stop’ command is as follows:
docker stop [OPTIONS] CONTAINER [CONTAINER...]Stopping All Docker Containers: A Handy Approach
There may be situations where you need to stop all Docker containers simultaneously. For instance, when performing system maintenance, updating Docker images, or troubleshooting issues, stopping all containers can be a convenient first step. The ‘docker stop’ command, when combined with the ‘-a’ flag, allows you to stop all running containers. Here’s an example:
docker stop -a $(docker ps -q)This command first retrieves the IDs of all running containers using ‘docker ps -q’ and then passes them to the ‘docker stop -a’ command, stopping all containers in one go.
Efficiently Removing Stopped Docker Containers
Removing stopped Docker containers is essential to maintain a clean system and avoid resource wastage. The ‘docker container prune’ command is a powerful tool for this purpose. When executed, it removes all stopped containers, along with any associated networks that are not in use by other containers. To use ‘docker container prune’, simply run the following command:
docker container prunePlease note that this command will prompt you for confirmation before removing any containers. To skip the confirmation step, use the ‘-f’ or ‘–force’ flag.
Combining Forces: Stopping and Removing All Docker Containers
To stop and remove all Docker containers in one go, you can combine the ‘docker stop -a’ and ‘docker container prune’ commands. This powerful combination allows you to clean up your system efficiently, freeing up resources and ensuring that all containers are properly stopped. Here’s an example:
docker stop -a $(docker ps -q); docker container prune -fThis command first stops all running containers and then removes all stopped containers, along with their associated networks.
Implementing Best Practices for Docker Container Lifecycle Management
Throughout this article, we have discussed various techniques and best practices related to the “docker stop all containers and remove” concept. To recap, consider incorporating the following practices into your Docker workflows:
- Always stop containers gracefully using the ‘docker stop’ command.
- Stop all containers simultaneously using the ‘docker stop -a’ command.
- Remove stopped containers regularly with the ‘docker container prune’ command.
- Combine ‘docker stop -a’ and ‘docker container prune’ for efficient system cleanup.
Additional Tips and Tricks for Docker Container Mastery
To further enhance your Docker container management skills, consider the following tips and tricks:
- Create aliases or shell functions for frequently used Docker commands to simplify your workflow.
- Explore third-party tools and plugins designed to automate and simplify Docker container lifecycle management tasks.
- Stay up-to-date with the latest Docker releases and features to continuously improve your skills and productivity.
Frequently Asked Questions about Docker Container Lifecycle Management
Q: What happens when I use the ‘docker stop -a’ command?
A: The ‘docker stop -a’ command sends a SIGTERM signal to all running containers, allowing them to terminate gracefully. If the processes do not terminate within the default 10-second timeout period, a SIGKILL signal is sent, abruptly halting the containers.
Q: Can I skip the confirmation step when using ‘docker container prune’?
A: Yes, you can use the ‘-f’ or ‘–force’ flag with the ‘docker container prune’ command to skip the confirmation step and immediately remove all stopped containers and their associated networks.
Effortlessly Managing Docker Containers: A Comprehensive Guide
Gracefully Stopping Docker Containers
Properly stopping Docker containers is essential for maintaining a clean system and ensuring that processes within containers are given the opportunity to finish gracefully. The ‘docker stop’ command is designed for this purpose. By default, it sends a SIGTERM signal to the container’s main process, allowing it to terminate gracefully within a 10-second timeout period. If the process does not terminate within this time frame, a SIGKILL signal is sent, abruptly halting the container. The basic syntax for the ‘docker stop’ command is as follows:
docker stop [OPTIONS] CONTAINER [CONTAINER...]For example, to stop a container with the ID ‘abc123’, you would run:
docker stop abc123Using the ‘docker stop’ command in your Docker workflows helps maintain a clean and organized system, making it easier to manage and scale your applications.

Effortlessly Managing Docker Containers: A Comprehensive Guide
Stopping All Docker Containers: A Handy Approach
There may be situations where stopping all Docker containers simultaneously is necessary, such as when performing system maintenance, updating Docker images, or troubleshooting issues. The ‘docker stop’ command, when combined with the ‘-a’ flag, allows you to stop all running containers efficiently. Here’s an example:
docker stop -a $(docker ps -q)This command first retrieves the IDs of all running containers using ‘docker ps -q’ and then passes them to the ‘docker stop -a’ command, stopping all containers in one go. The ‘-a’ flag ensures that all containers, regardless of their status, are stopped. This approach is particularly useful when you need to clean up your system quickly and ensure that no unnecessary containers are consuming resources.

Effortlessly Managing Docker Containers: A Comprehensive Guide
Efficiently Removing Stopped Docker Containers
Efficiently managing Docker containers includes removing stopped containers to maintain a clean system and avoid resource wastage. The ‘docker container prune’ command is a powerful tool for this purpose. When executed, it removes all stopped containers, along with any associated networks that are not in use by other containers. To use ‘docker container prune’, simply run the following command:
docker container prunePlease note that this command will prompt you for confirmation before removing any containers. To skip the confirmation step, use the ‘-f’ or ‘–force’ flag.
Regularly removing stopped containers helps keep your system organized and running smoothly, ensuring that resources are available for active containers and reducing clutter in your Docker environment.

Effortlessly Managing Docker Containers: A Comprehensive Guide
Combining Forces: Stopping and Removing All Docker Containers
In certain situations, you might need to stop and remove all Docker containers in one go. For instance, when performing system maintenance, updating Docker images, or troubleshooting issues, this powerful combination of commands can help you clean up your system efficiently. Here’s how:
First, use the ‘docker stop -a’ command to stop all running containers:
docker stop -a $(docker ps -q)This command first retrieves the IDs of all running containers using ‘docker ps -q’ and then passes them to the ‘docker stop -a’ command, stopping all containers in one go. The ‘-a’ flag ensures that all containers, regardless of their status, are stopped.
Next, remove all stopped containers using the ‘docker container prune’ command:
docker container prune -fThe ‘-f’ or ‘–force’ flag skips the confirmation step, immediately removing all stopped containers and their associated networks. This approach is particularly useful when you need to clean up your system quickly and ensure that no unnecessary containers are consuming resources.

Effortlessly Managing Docker Containers: A Comprehensive Guide
Implementing Best Practices for Docker Container Lifecycle Management
To ensure optimal performance and resource management in your Docker environment, follow these best practices when handling Docker container lifecycles:
- Gracefully stop Docker containers using the ‘docker stop’ command, allowing processes within containers to finish gracefully.
- Stop all Docker containers simultaneously using the ‘docker stop -a’ command when necessary, such as during system maintenance or when updating Docker images.
- Remove stopped Docker containers efficiently using the ‘docker container prune’ command to maintain a clean system and avoid resource wastage.
- Consider automating container lifecycle management tasks using aliases, shell functions, or third-party tools for added convenience and efficiency.
By incorporating these best practices, you can effectively manage Docker container lifecycles, ensuring a smooth and organized Docker environment. Regularly stopping and removing unnecessary containers helps maintain system performance, reduce clutter, and make it easier to manage and scale your applications.

Effortlessly Managing Docker Containers: A Comprehensive Guide
Additional Tips and Tricks for Docker Container Mastery
To further simplify and automate Docker container lifecycle management tasks, consider implementing these additional tips and tricks:
- Create aliases: Create aliases for commonly used Docker commands to save time and reduce typing. For example, add the following line to your shell configuration file (e.g., .bashrc or .zshrc) to create an alias for stopping and removing all containers:
alias docker-cleanup='docker stop -a $(docker ps -q); docker container prune -f'Now, you can simply run ‘docker-cleanup’ to stop and remove all containers in one go.
- Use shell functions: Create shell functions to combine multiple Docker commands into a single, reusable function. For example:
docker_cleanup() { docker stop -a $(docker ps -q) docker container prune -f }Call the function with ‘docker\_cleanup’ to stop and remove all containers.
- Explore third-party tools: Numerous third-party tools and projects are available to help manage Docker containers more efficiently. Some popular options include:
- Docker Compose: A tool for defining and running multi-container Docker applications.
- Portainer: A lightweight, web-based Docker management tool.
- Rancher: A complete container management platform for running Docker in production.
By incorporating these additional tips and tricks, you can further streamline your Docker container management workflows, making it even easier to handle container lifecycles effectively.
Effortlessly Managing Docker Containers: A Comprehensive Guide
Frequently Asked Questions about Docker Container Lifecycle Management
Q: Why should I stop and remove all Docker containers using the ‘docker stop -a’ and ‘docker container prune’ commands?
A: Stopping and removing all Docker containers can help maintain a clean system, avoid resource wastage, and ensure that your Docker environment is running optimally. By using the ‘docker stop -a’ command, you can gracefully stop all containers, giving processes within containers the opportunity to finish gracefully. The ‘docker container prune’ command then removes all stopped containers and their associated networks, freeing up resources for other tasks.
Q: How do I use the ‘docker stop -a’ and ‘docker container prune’ commands together?
A: To use these commands together, first run ‘docker stop -a’ to stop all containers:
docker stop -a $(docker ps -q)Next, run ‘docker container prune’ to remove all stopped containers and their associated networks:
docker container prune -fAlternatively, you can create an alias or shell function to combine these commands into a single, reusable command, as described in the ‘Additional Tips and Tricks’ section of this guide.
Q: Are there any downsides to stopping and removing all Docker containers?
A: Stopping and removing all Docker containers can disrupt running applications and services. Before using these commands, ensure that it is appropriate to stop and remove containers in your specific situation. Additionally, consider using the ‘–filter’ option with the ‘docker container prune’ command to selectively remove containers based on specific criteria, such as age or name.
Q: Can I automate the process of stopping and removing Docker containers?
A: Yes, you can automate this process using aliases, shell functions, or third-party tools, as described in the ‘Additional Tips and Tricks’ section of this guide. Automating container lifecycle management tasks can help save time, reduce errors, and ensure a consistent and organized Docker environment.