Virtual machines (VMs) have become increasingly popular in recent years due to their resource efficiency, flexibility, and security. Ubuntu, one of the most widely used Linux distributions, has emerged as a preferred choice for VMs. Ubuntu for VMs offers numerous advantages, including a robust and secure environment, easy installation, and extensive community support. This article provides an in-depth analysis of Ubuntu-compatible virtualization platforms and highlights the key benefits of using Ubuntu for VMs.
VirtualBox: A Popular and Open-Source Solution for Ubuntu VMs
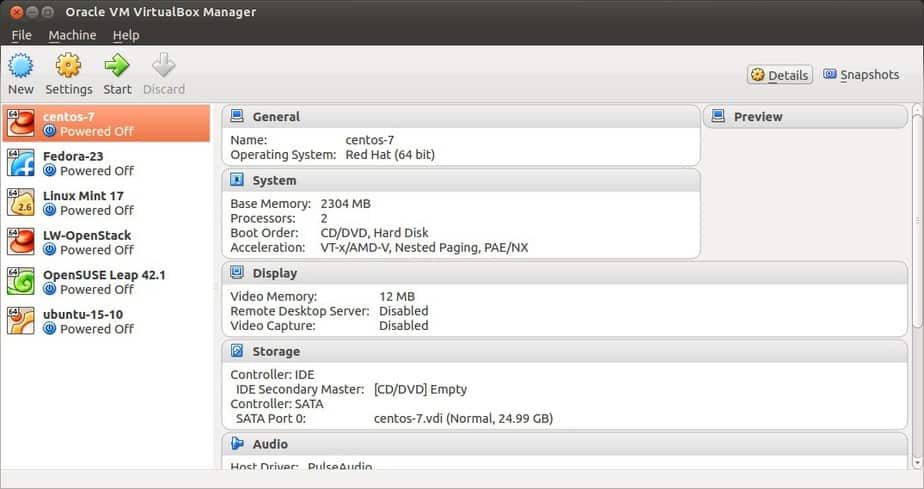
VirtualBox is an open-source virtualization platform that supports Ubuntu, offering users a reliable and feature-rich solution for creating and managing virtual machines. Developed by Oracle, VirtualBox boasts a wide range of functionalities, including support for guest multi-screen resolutions, 3D acceleration, and remote desktop capabilities. Its ease of use, strong community support, and cross-platform compatibility make it a popular choice among Ubuntu users.
One of the primary advantages of using VirtualBox for Ubuntu VMs is its intuitive user interface, which simplifies the process of creating and configuring virtual machines. Users can easily customize settings related to hardware, storage, networking, and security. Additionally, VirtualBox provides snapshot functionality, allowing users to save the current state of a VM and revert to it at any time, ensuring a consistent and stable environment.
While VirtualBox offers numerous benefits, it is essential to acknowledge its potential drawbacks. VirtualBox may not perform as well as other commercial virtualization solutions when it comes to high-performance workloads or resource-intensive applications. However, for most general-purpose use cases, VirtualBox provides satisfactory performance and stability.
VirtualBox has a large and active community, which contributes to its extensive documentation and support resources. Users can access forums, tutorials, and troubleshooting guides, ensuring that they can overcome any challenges they may encounter while working with Ubuntu VMs. Furthermore, VirtualBox releases regular updates, addressing bugs and incorporating new features, ensuring that users have access to the latest virtualization technology.
VMware Workstation Player: A Powerful Option for Experienced Ubuntu Users
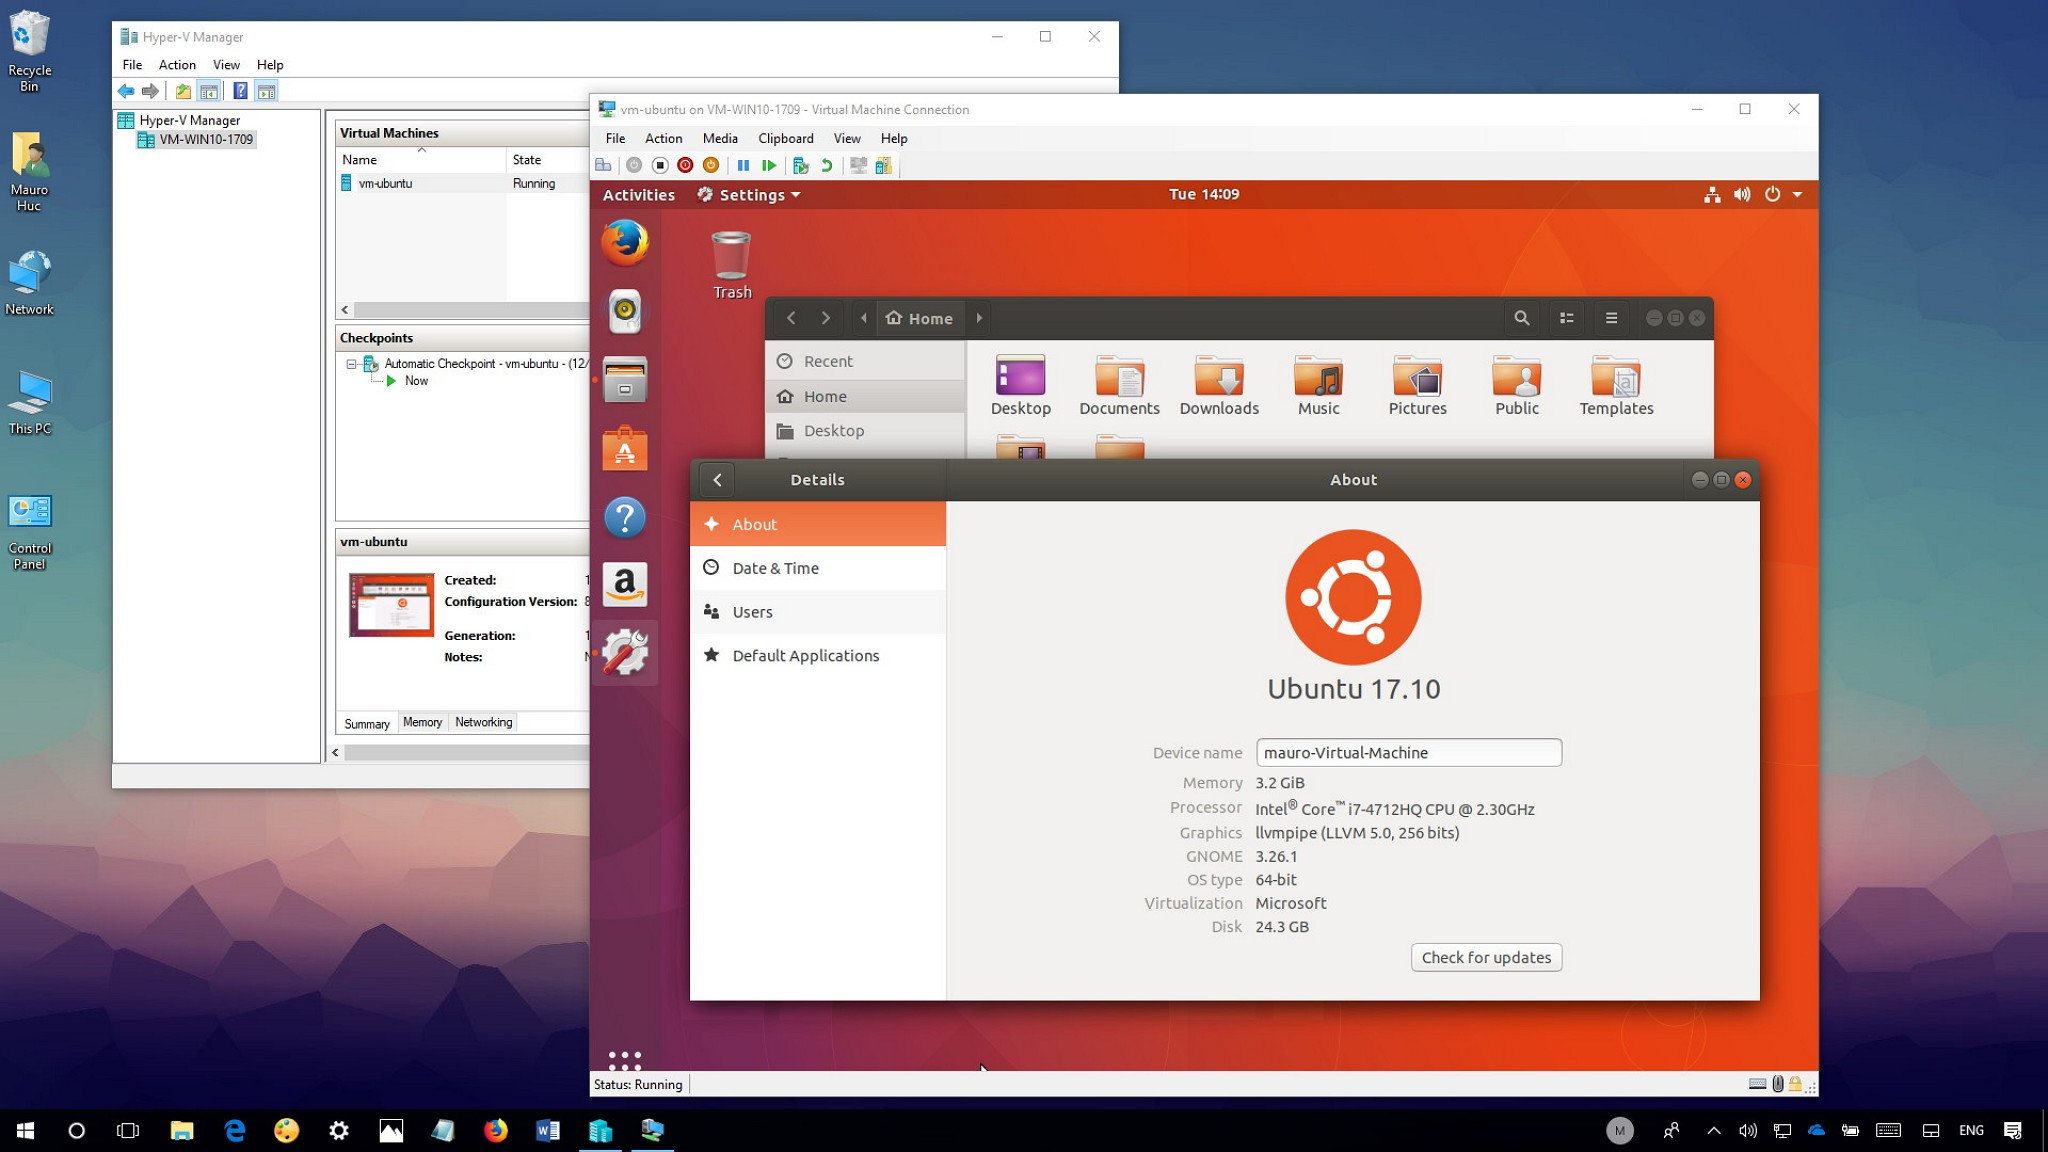
VMware Workstation Player is a powerful virtualization solution for Ubuntu, designed for experienced users seeking advanced features and capabilities. As a commercial product, VMware Workstation Player offers robust performance, seamless integration with the host operating system, and exceptional stability. Users can create, run, and manage virtual machines with ease, making it an ideal choice for professionals and organizations requiring a high-performance virtualization platform.
VMware Workstation Player supports a wide range of guest operating systems, including various Linux distributions, Windows versions, and BSD. Its system requirements are moderate, with users needing a 64-bit processor and at least 2GB of RAM for optimal performance. VMware Workstation Player also offers a user-friendly interface, allowing users to navigate its features and settings effortlessly.
While VMware Workstation Player provides numerous advantages, it is essential to consider its potential drawbacks. Unlike VirtualBox, VMware Workstation Player is not entirely free for personal use, and users must purchase a license for commercial deployments. Additionally, VMware Workstation Player may have a steeper learning curve compared to other virtualization platforms, making it less accessible for beginners.
Comparatively, VMware Workstation Player outperforms VirtualBox in terms of features and performance. Users can benefit from advanced functionalities such as virtual machine cloning, restricted virtual machines, and VMware vSphere integration. However, these additional features come at a cost, and users must weigh the benefits against the price of a license.
VMware Workstation Player boasts an extensive community, providing users with access to documentation, tutorials, and troubleshooting guides. Users can leverage these resources to overcome challenges and make the most of their virtualization experience. VMware also offers professional support and consulting services, ensuring that users have access to expert assistance when needed.
QEMU and KVM: Open-Source Solutions for Advanced Ubuntu Users
QEMU and KVM are two open-source virtualization technologies natively supported in Ubuntu, providing advanced users with powerful and flexible virtualization capabilities. QEMU, which stands for Quick Emulator, is a full system emulator that can run operating systems and programs for different machine types. KVM, or Kernel-based Virtual Machine, is a full virtualization solution built into the Linux kernel, leveraging QEMU’s emulation capabilities to provide hardware virtualization.
QEMU and KVM offer several advantages, including high performance, low overhead, and seamless integration with Ubuntu. These technologies support various architectures, such as x86, ARM, and PowerPC, and can run multiple guest operating systems concurrently. QEMU and KVM also provide live migration capabilities, enabling users to move running virtual machines between hosts without any downtime.
However, QEMU and KVM have limitations that may not make them suitable for all users. These technologies primarily cater to experienced users comfortable with command-line interfaces, as they require manual configuration and management. Additionally, QEMU and KVM may not offer the same level of ease-of-use and community support as other virtualization platforms, such as VirtualBox and VMware Workstation Player.
To get started with QEMU and KVM on Ubuntu, users can install the `qemu-kvm` package, which includes the necessary tools and utilities. Users can then create, configure, and manage virtual machines using command-line tools such as `virsh`, `virt-install`, and `virt-manager`. While QEMU and KVM may have a steeper learning curve, they provide users with unparalleled flexibility and control over their virtualization environment.
How to Choose the Right Ubuntu Virtual Machine Software
Setting Up and Configuring Ubuntu VMs on Your Preferred Platform
Once you have selected the most suitable Ubuntu virtualization platform based on your needs and preferences, it’s time to install and configure Ubuntu VMs. This section provides step-by-step instructions for setting up Ubuntu VMs on VirtualBox, VMware Workstation Player, and QEMU/KVM.
Setting Up Ubuntu VMs on VirtualBox
To install Ubuntu on VirtualBox, follow these steps:
Download the Ubuntu ISO image from the official website.
Launch VirtualBox and click on “New” to create a new virtual machine.
Enter a name for your VM, select “Linux” as the type, and choose “Ubuntu (64-bit)” as the version.
Allocate the desired amount of RAM and create a virtual hard disk.
Select “Create a virtual hard disk now” and choose “VDI (VirtualBox Disk Image)” as the file format.
Adjust the storage settings, such as the disk size and file location, as needed.
Select the newly created VM and click on “Settings.”
Under “Storage,” add the Ubuntu ISO image as the optical drive’s storage device.
Click “OK” and start the VM. The Ubuntu installer should launch automatically.
Follow the on-screen instructions to complete the installation process.
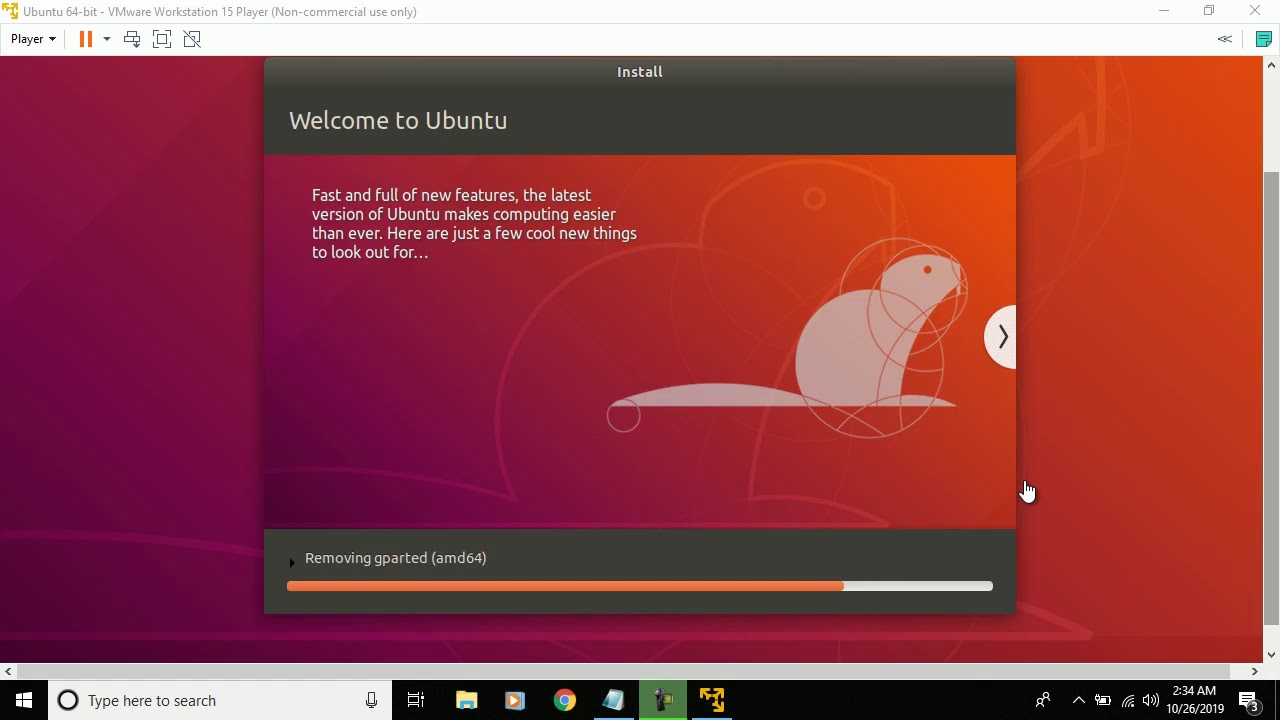
Setting Up Ubuntu VMs on VMware Workstation Player
To install Ubuntu on VMware Workstation Player, follow these steps:
Download the Ubuntu ISO image from the official website.
Launch VMware Workstation Player and click on “Create a New Virtual Machine.”
Select “Installer disc image file (iso)” and browse to the Ubuntu ISO image.
Enter a name for your VM, select “Linux” as the guest operating system, and choose “Ubuntu 64-bit” as the version.
Allocate the desired amount of RAM and create a virtual hard disk.
Customize the virtual hardware settings as needed, such as the network connection or storage controller.
Click “Finish” to create the VM and start the installation process.
Follow the on-screen instructions to complete the installation.
Setting Up Ubuntu VMs on QEMU/KVM
To install Ubuntu on QEMU/KVM, follow these steps:
Open a terminal and install the `qemu-kvm` and `libvirt-daemon-system` packages.
Define the VM’s hardware settings, such as the CPU, memory, and storage devices, within the XML file.
Add the Ubuntu ISO image as the CD-ROM device in the XML file.
Register the VM with libvirt by running `virsh define `.
Start the VM by running `virsh start `.
Connect to the VM using a VNC client or the `virsh console` command.
Follow the on-screen instructions to complete the Ubuntu installation.
Regardless of the virtualization platform you choose, remember to optimize performance, ensure security, and manage virtual machines effectively. Monitor resource usage, apply security updates regularly, and consider using tools like `virt-manager` or the VirtualBox web interface for centralized management.
Maximizing Ubuntu VMs for Development, Testing, and Production Environments
Ubuntu virtual machines (VMs) offer numerous benefits for development, testing, and production environments. By leveraging VMs, you can create isolated and portable development environments, test applications across various configurations, and deploy applications in a scalable and manageable manner.
Development Environments
Ubuntu VMs simplify development tasks by enabling developers to create consistent and reproducible environments. By using VMs, developers can:
Isolate development tools and dependencies from the host system.
Test applications across multiple Ubuntu versions and configurations.
Collaborate more effectively by sharing VM configurations and images.
Testing Environments
Ubuntu VMs are ideal for testing applications and software updates. By using VMs, you can:
Simulate various system configurations and hardware profiles.
Test applications for compatibility and performance issues.
Minimize the risk of affecting the host system during testing.
Production Environments
Ubuntu VMs can be used to deploy applications and services in production environments. By using VMs, you can:
Create scalable and manageable infrastructure using cloud services or on-premises solutions.
Implement robust security policies and access controls.
Simplify maintenance and updates by managing VMs centrally.
Real-World Examples and Success Stories
Many organizations have successfully adopted Ubuntu VMs for development, testing, and production. For instance, Canonical, the company behind Ubuntu, uses VMs extensively for developing, testing, and delivering Ubuntu and its associated services. Other success stories include:
Wikimedia Foundation, which uses Ubuntu VMs for running their services, including Wikipedia.
LinuxGameCast, a gaming news and reviews website, which uses Ubuntu VMs for development and testing.
By adopting Ubuntu VMs, these organizations have been able to improve their development and deployment processes, reduce costs, and enhance security and scalability. By following best practices and staying updated with the latest developments in Ubuntu virtualization technology, you too can maximize the potential of Ubuntu VMs for your development, testing, and production environments.
Staying Updated and Troubleshooting Common Issues with Ubuntu VMs
To make the most of Ubuntu VMs, it’s crucial to stay updated with the latest developments in virtualization technology and address common issues effectively. This section provides guidance on how to maintain your Ubuntu VMs and troubleshoot problems that may arise.
Staying Updated
To stay updated with the latest features and security patches, ensure that your Ubuntu VM’s guest operating system and virtualization software are up-to-date. Regularly check for updates and apply them as needed:
For Ubuntu guest operating systems, use the built-in Software Updater tool or run `sudo apt update && sudo apt upgrade` in the terminal.
For VirtualBox, visit the official website and download the latest version. If you installed VirtualBox via a package manager, you can usually update it using the package manager’s update command (e.g., `sudo apt update && sudo apt upgrade virtualbox` for Debian-based distributions).
For VMware Workstation Player, download and install the latest version from the official website. VMware Workstation Player does not support in-place upgrades, so you’ll need to uninstall the old version before installing the new one.
For QEMU and KVM, update your Linux distribution, which will also update the QEMU and KVM packages. For example, run `sudo apt update && sudo apt upgrade` for Debian-based distributions.
Troubleshooting Common Issues
Here are some common issues you may encounter with Ubuntu VMs and potential solutions:
Performance issues: Optimize VM settings, allocate sufficient resources (CPU, memory, storage), and disable unnecessary features (e.g., 3D acceleration) to improve performance.
Network connectivity problems: Check network settings in the VM configuration, ensure that virtual switches are properly configured, and verify that the host machine’s network connection is working correctly.
Storage and disk space issues: Monitor VM disk usage, allocate additional storage if needed, and consider using thin provisioning or dynamic disk allocation to optimize storage usage.
Guest operating system installation failures: Ensure that the ISO image is valid, check for any known issues with the specific VM software and Ubuntu version, and verify that the VM settings are correctly configured.
For further learning and support, consider exploring Ubuntu and virtualization forums, documentation, and tutorials. These resources can help you deepen your understanding of Ubuntu VMs, optimize their performance, and troubleshoot issues effectively.