What is PowerBI Gateway and Why Download it?
PowerBI Gateway is a powerful data integration and refresh tool developed by Microsoft for businesses and organizations. Its primary function is to facilitate seamless data transfer between on-premises data sources and PowerBI, ensuring that your reports and dashboards are always up-to-date with the latest information. By downloading and installing the PowerBI Gateway, users can take advantage of its numerous benefits, including:
- Efficient data refresh: The PowerBI Gateway allows for quick and easy data refreshes, ensuring that your reports and dashboards are always accurate and relevant.
- Enhanced security: By using the PowerBI Gateway, you can maintain control over your data and adhere to your organization’s security policies, as data remains on-premises and is never stored in the cloud.
- Scalability: The PowerBI Gateway supports a wide range of data sources, allowing your organization to grow and adapt to changing business needs without worrying about data connectivity issues.
- Simplified data management: The PowerBI Gateway streamlines the data management process, making it easier for users to access and analyze data from various sources.
Given these advantages, downloading the PowerBI Gateway is an essential step for businesses and organizations looking to maximize their PowerBI experience and derive valuable insights from their data.
Identifying the Right PowerBI Gateway for Your Needs
Choosing the correct PowerBI Gateway for your organization is essential for ensuring seamless data integration and refresh. Microsoft offers two types of PowerBI Gateways: Personal Mode and Standard Mode. Understanding the features and ideal use cases of each mode will help you make an informed decision.
PowerBI Gateway: Personal Mode
Personal Mode is designed for individual users who need to connect to on-premises data sources for their personal use. Key features of Personal Mode include:
- Single user access: Personal Mode is intended for use by a single individual, ensuring that data access is secure and controlled.
- Limited data sources: Personal Mode supports a limited number of data sources, including Excel, SQL Server, and SharePoint.
- Easy setup: Personal Mode is simple to set up and requires minimal IT support, making it an excellent option for small-scale data integration needs.
PowerBI Gateway: Standard Mode
Standard Mode is designed for organizations with more extensive data integration requirements. It supports a broader range of data sources and allows for multiple users to connect to on-premises data. Key features of Standard Mode include:
- Multiple user access: Standard Mode enables data access for multiple users within an organization, facilitating collaboration and data sharing.
- Wide range of data sources: Standard Mode supports a diverse array of data sources, including SQL Server, Oracle, and IBM DB2, making it suitable for complex data integration scenarios.
- Centralized management: Standard Mode allows for centralized management of data connections, ensuring consistency and control over data access and security.
When deciding between Personal Mode and Standard Mode, consider the size of your organization, the number of data sources you need to connect, and the level of collaboration and data sharing required. By selecting the appropriate PowerBI Gateway, you can ensure a smooth and efficient data integration process.
How to Download PowerBI Gateway: Step-by-Step Instructions
Downloading the PowerBI Gateway is a straightforward process that can be completed in a few simple steps. Follow this step-by-step guide to download the PowerBI Gateway and ensure a smooth setup.
Step 1: Access the PowerBI Service
Begin by signing in to the PowerBI service using your Microsoft account. Once logged in, navigate to the “Settings” menu, which can be found by clicking on your profile picture in the top right corner of the screen.
Step 2: Navigate to the Admin Portal
From the “Settings” menu, select “Admin portal.” This will take you to the PowerBI admin portal, where you can manage various aspects of your PowerBI environment, including the installation and configuration of the PowerBI Gateway.
Step 3: Access the “PowerBI Gateways” Section
In the left-hand menu of the admin portal, locate and click on the “PowerBI Gateways” option. This will display the current list of PowerBI Gateways associated with your account, as well as the option to download a new PowerBI Gateway.
Step 4: Download the PowerBI Gateway
To download the PowerBI Gateway, click on the “Download” button in the top right corner of the “PowerBI Gateways” page. This will initiate the download of the PowerBI Gateway setup file, which you can save to your preferred location on your local device.
Step 5: Run the PowerBI Gateway Setup File
Once the download is complete, locate the PowerBI Gateway setup file in your saved files and double-click on it to begin the installation process. Follow the on-screen instructions to complete the installation and configure your PowerBI Gateway.
By following these simple steps, you can successfully download the PowerBI Gateway and take the first step towards seamless data integration and refresh for your PowerBI reports and dashboards.
Installing PowerBI Gateway: A Smooth Process
After downloading the PowerBI Gateway, you can proceed with the installation process. This section outlines the steps to install the PowerBI Gateway on your local device, addressing potential issues and offering troubleshooting tips to ensure a successful setup.
Step 1: Run the PowerBI Gateway Setup File
Locate the PowerBI Gateway setup file in your saved files and double-click on it to begin the installation process. Follow the on-screen instructions to start the installation.
Step 2: Accept the License Agreement
Review the PowerBI Gateway license agreement and click “Accept” to proceed with the installation.
Step 3: Choose the Installation Folder
Select the installation folder for the PowerBI Gateway. We recommend using the default installation path, but you can choose a different location if necessary.
Step 4: Create a Shortcut (Optional)
Decide whether to create a desktop shortcut for the PowerBI Gateway. This step is optional but can make it easier to access the PowerBI Gateway in the future.
Step 5: Complete the Installation
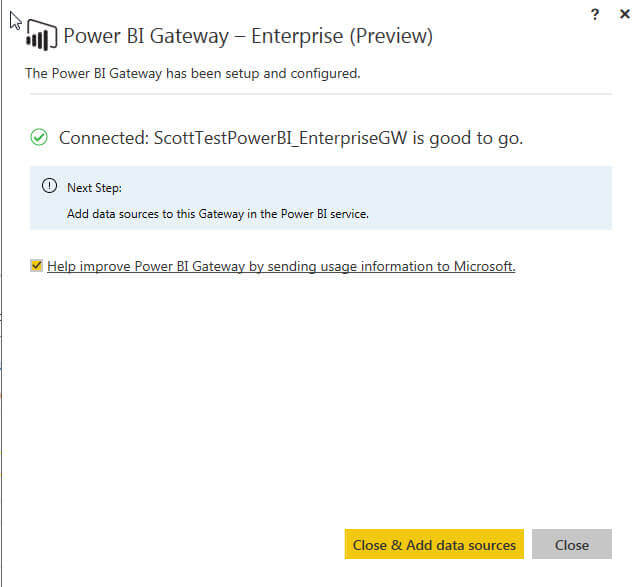
Follow the remaining on-screen instructions to complete the installation. Once the installation is finished, the PowerBI Gateway will launch automatically.
Troubleshooting Common Installation Issues
If you encounter any issues during the installation process, consider the following troubleshooting tips:
- Ensure that your device meets the minimum system requirements for the PowerBI Gateway.
- Close any unnecessary applications that may be running in the background, as they could interfere with the installation process.
- Run the PowerBI Gateway setup file as an administrator to ensure that you have the necessary permissions to install the software.
- If you’re still experiencing issues, consult the PowerBI Gateway documentation or contact Microsoft Support for further assistance.
By following these steps and addressing potential issues, you can ensure a smooth installation process for the PowerBI Gateway, paving the way for seamless data integration and refresh for your PowerBI reports and dashboards.
Configuring PowerBI Gateway: Optimizing Data Refresh Rates
Configuring the PowerBI Gateway is essential for ensuring timely and accurate data analysis. By optimizing data refresh rates, you can maintain up-to-date reports and dashboards, providing valuable insights for your business or organization. This section outlines the steps to configure the PowerBI Gateway for optimal data refresh rates.
Step 1: Access the PowerBI Service
Begin by signing in to the PowerBI service using your Microsoft account. Once logged in, navigate to the workspace containing the dataset you want to configure.
Step 2: Navigate to the Dataset Settings
In the workspace, locate the dataset you wish to configure and click on the ellipsis (…) next to its name. From the dropdown menu, select “Settings.” This will take you to the dataset settings page.
Step 3: Configure Data Refresh
On the dataset settings page, click on the “Data refresh” option in the left-hand menu. This will display the current data refresh settings for the dataset, including the scheduled refresh frequency and any applicable limitations.
Step 4: Adjust the Refresh Frequency
To optimize the data refresh rates, adjust the refresh frequency as needed. You can choose from various options, including hourly, daily, or weekly refreshes. Keep in mind that more frequent refreshes may require additional resources and could impact performance.
Step 5: Save Your Changes
Once you’ve adjusted the data refresh settings, click “Save” to apply the changes. The PowerBI Gateway will now manage the data refresh process according to your configured settings.
Tips for Optimizing Data Refresh Rates
To ensure optimal data refresh rates, consider the following best practices:
- Schedule data refreshes during off-peak hours to minimize performance impact.
- Monitor data refresh performance and adjust settings as needed to maintain timely and accurate data analysis.
- Ensure that the PowerBI Gateway is installed and configured correctly, as improper setup could lead to suboptimal data refresh rates.
By following these steps and implementing best practices, you can configure the PowerBI Gateway to optimize data refresh rates, ensuring timely and accurate data analysis for your business or organization.
Troubleshooting Common PowerBI Gateway Issues
While using the PowerBI Gateway, users may encounter various challenges that can impact data integration and refresh. This section outlines common issues and offers practical solutions and workarounds to help you overcome these hurdles.
Issue 1: Connection Timeouts
Connection timeouts can occur when the PowerBI Gateway takes too long to establish a connection with a data source. To address this issue, consider the following solutions:
- Check the network connection between the PowerBI Gateway and the data source.
- Ensure that the data source is running and accessible.
- Optimize data source queries to reduce the time required to retrieve data.
Issue 2: Data Refresh Failures
Data refresh failures can occur due to various reasons, including incorrect data source credentials, insufficient permissions, or changes to the data source schema. To troubleshoot data refresh failures, consider the following:
- Verify the data source credentials and permissions.
- Investigate any recent changes to the data source schema and update the PowerBI Gateway configuration accordingly.
- Review PowerBI Gateway logs for additional information on the failure.
Issue 3: Performance Degradation
Performance degradation can impact data integration and refresh rates, leading to delays and inaccuracies. To address performance degradation, consider the following:
- Monitor system resources, such as CPU, memory, and network usage, to identify potential bottlenecks.
- Optimize data source queries and configurations to reduce the load on the PowerBI Gateway.
- Ensure that the PowerBI Gateway is installed on a dedicated, high-performance device.
Issue 4: Firewall and Network Configuration Challenges
Firewall and network configurations can impact the PowerBI Gateway’s ability to connect to data sources. To overcome these challenges, consider the following:
- Configure firewalls and network settings to allow traffic between the PowerBI Gateway and data sources.
- Use trusted SSL certificates for secure data transmission.
- Consult with your network administrator to ensure that the PowerBI Gateway meets your organization’s security policies.
By understanding and addressing these common PowerBI Gateway issues, you can ensure a smooth and efficient data integration and refresh process for your PowerBI reports and dashboards.
Maximizing the Potential of PowerBI Gateway: Best Practices
To maximize the potential of the PowerBI Gateway and ensure seamless data integration and refresh, follow these best practices, including maintenance tips, security recommendations, and integration strategies.
Best Practice 1: Regular Maintenance
Regularly monitor and maintain the PowerBI Gateway to ensure optimal performance. This includes checking for updates, reviewing system logs, and addressing any identified issues promptly.
Best Practice 2: Security Recommendations
Implement robust security measures to protect your data and maintain compliance with your organization’s policies. This includes using strong passwords, enabling multi-factor authentication, and restricting access to authorized users only.
Best Practice 3: Integration Strategies
Design and implement effective integration strategies to streamline data flow and minimize potential disruptions. This includes normalizing data, optimizing queries, and leveraging caching techniques to reduce the load on the PowerBI Gateway.
Best Practice 4: Performance Optimization
Optimize the PowerBI Gateway’s performance by ensuring that it is installed on a dedicated, high-performance device. Additionally, monitor system resources, such as CPU, memory, and network usage, to identify potential bottlenecks and address them proactively.
Best Practice 5: Collaboration and Communication
Encourage collaboration and communication among team members to ensure a smooth data integration and refresh process. This includes sharing best practices, addressing challenges promptly, and maintaining open lines of communication to facilitate problem-solving and continuous improvement.
Best Practice 6: Documentation and Training
Document the PowerBI Gateway configuration and processes, and provide regular training to users to ensure that they are familiar with its features and capabilities. This will help minimize potential issues and ensure that users can maximize the PowerBI Gateway’s potential.
By following these best practices, you can ensure that your PowerBI Gateway is configured, maintained, and utilized effectively, leading to seamless data integration and accurate, timely data analysis for your business or organization.
Staying Updated: PowerBI Gateway Upgrades and Enhancements
Keeping the PowerBI Gateway up-to-date is essential to ensure seamless data integration and refresh, as well as to benefit from new features and improvements. This section explains the importance of staying updated and provides guidance on how to stay informed about PowerBI Gateway upgrades and enhancements.
The Importance of Staying Updated
Staying updated with the latest PowerBI Gateway versions ensures that you can take advantage of new features, improvements, and bug fixes. Additionally, staying updated helps maintain compatibility with other Microsoft services and products, reducing potential issues and ensuring a smooth data integration and refresh process.
How to Stay Informed About PowerBI Gateway Upgrades and Enhancements
To stay informed about PowerBI Gateway upgrades and enhancements, follow these steps:
- Regularly visit the PowerBI Roadmap page to learn about upcoming features and improvements.
- Follow the PowerBI Community to engage with other users, share experiences, and get insights into best practices and troubleshooting tips.
- Subscribe to the PowerBI Blog to receive updates on new features, releases, and announcements directly from the PowerBI team.
- Monitor the PowerBI Release Notes for detailed information on the latest updates and changes.
Updating the PowerBI Gateway
When a new PowerBI Gateway version is available, follow these steps to update:
- Launch the PowerBI Gateway application on your local device.
- Navigate to the “Help” menu and select “Check for Updates.”
- If an update is available, follow the on-screen instructions to download and install the update.
- After the update is installed, restart the PowerBI Gateway application to ensure that the new version is active.
By staying updated and informed about PowerBI Gateway upgrades and enhancements, you can ensure that your data integration and refresh processes remain efficient, accurate, and secure, providing valuable insights for your business or organization.


