What is GitHub and Why Install it on Windows?
GitHub is a widely-used version control platform and collaboration tool for software developers. It offers a centralized hub where developers can manage code, track changes, and work together on projects. Installing GitHub for Windows provides several benefits, including easy access to open-source projects, seamless code sharing, and efficient teamwork. By having GitHub on your Windows system, you can leverage its powerful features to streamline your development workflow and enhance collaboration with your team.

System Requirements and Preparing for the Installation
Before installing GitHub for Windows, ensure that your system meets the necessary requirements. The software is compatible with Windows 7, 8, and 10, and it requires the .NET Framework 4.5.1 or higher. Additionally, a minimum of 1 GB of RAM and 100 MB of free disk space is recommended. To guarantee a smooth installation process, consider backing up important data and ensuring sufficient storage space.
Preparing your system for the installation involves several steps. First, verify that your Windows operating system is up-to-date. This ensures that any potential compatibility issues are addressed. Next, check that the .NET Framework is installed and updated to the latest version. Finally, ensure that you have administrative privileges on your system, as the installation process may require these permissions.
Downloading and Installing GitHub for Windows
To begin the installation process, navigate to the official GitHub for Windows download page. Locate the “Download GitHub Desktop” button and click on it to download the installer. Save the installer to a location that is easily accessible, such as your desktop or downloads folder.
Once the installer has finished downloading, double-click on the file to launch the installation wizard. Follow these steps to complete the installation:
- Accept the license agreement by checking the box next to “I accept the terms in the License Agreement.”
- Choose the installation directory by clicking the “Change” button. Select a location with sufficient storage space and click “OK” to continue.
- Configure user settings, including your default editor and Git version. You can also choose whether to enable Git LFS (Large File Storage) during this step.
- Click the “Install” button to begin the installation process. This may take several minutes, depending on your system’s performance.
- Once the installation is complete, click the “Finish” button to launch GitHub for Windows.
During the installation process, ensure that you have administrative privileges on your system, as the installer may require these permissions.
Initial Setup and Configuration
After successfully installing GitHub for Windows, it is crucial to complete the initial setup and configuration process. This ensures that your development environment is properly configured for version control and collaboration. Here are the steps to follow:
- Create a new repository: To create a new repository, click on the “+” button in the upper left corner of the GitHub Desktop application. Select “New repository” and enter a name, description, and optionally, a README file. Choose whether to make the repository public or private, and click “Create repository” to complete the process.
- Clone an existing repository: If you want to work on an existing project, you can clone the repository to your local machine. To do this, navigate to the “Repository” menu and select “Clone repository.” Enter the URL of the repository and choose a local directory to save the cloned repository. Click “Clone” to complete the process.
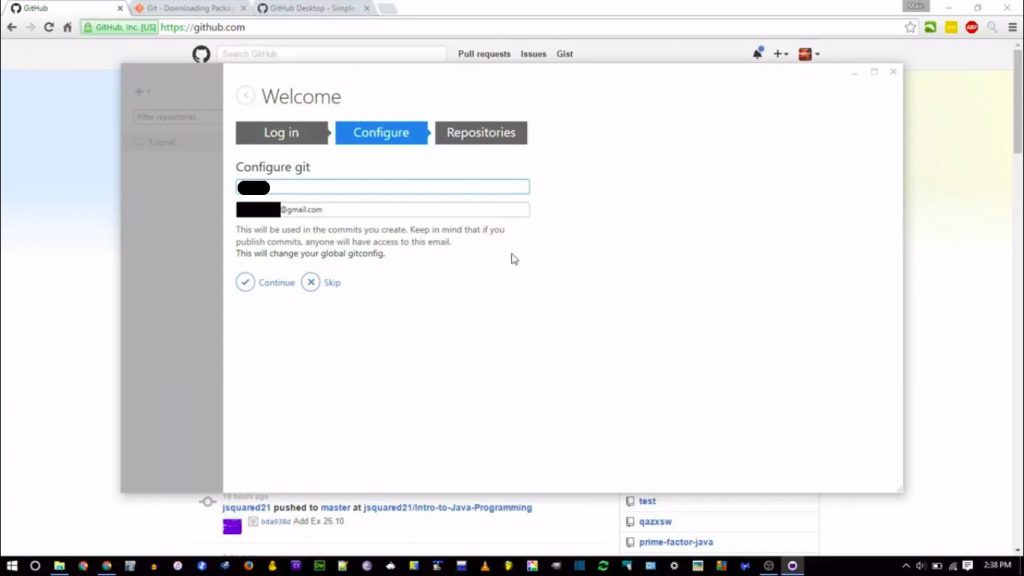
- Configure user settings: Properly configuring user settings is essential for tracking changes and collaborating with others. To configure your user settings, navigate to the “Repository” menu and select “Repository settings.” Enter your name and email address, and click “Save” to complete the process. This associates your changes with your GitHub account.
When organizing and managing repositories, consider these best practices:
- Keep related files within the same repository to maintain a clear and organized project structure.
- Use descriptive names for repositories, branches, and files to facilitate easy navigation and understanding.
- Regularly commit changes to your local repository and push updates to the remote repository to ensure that your work is backed up and accessible to collaborators.
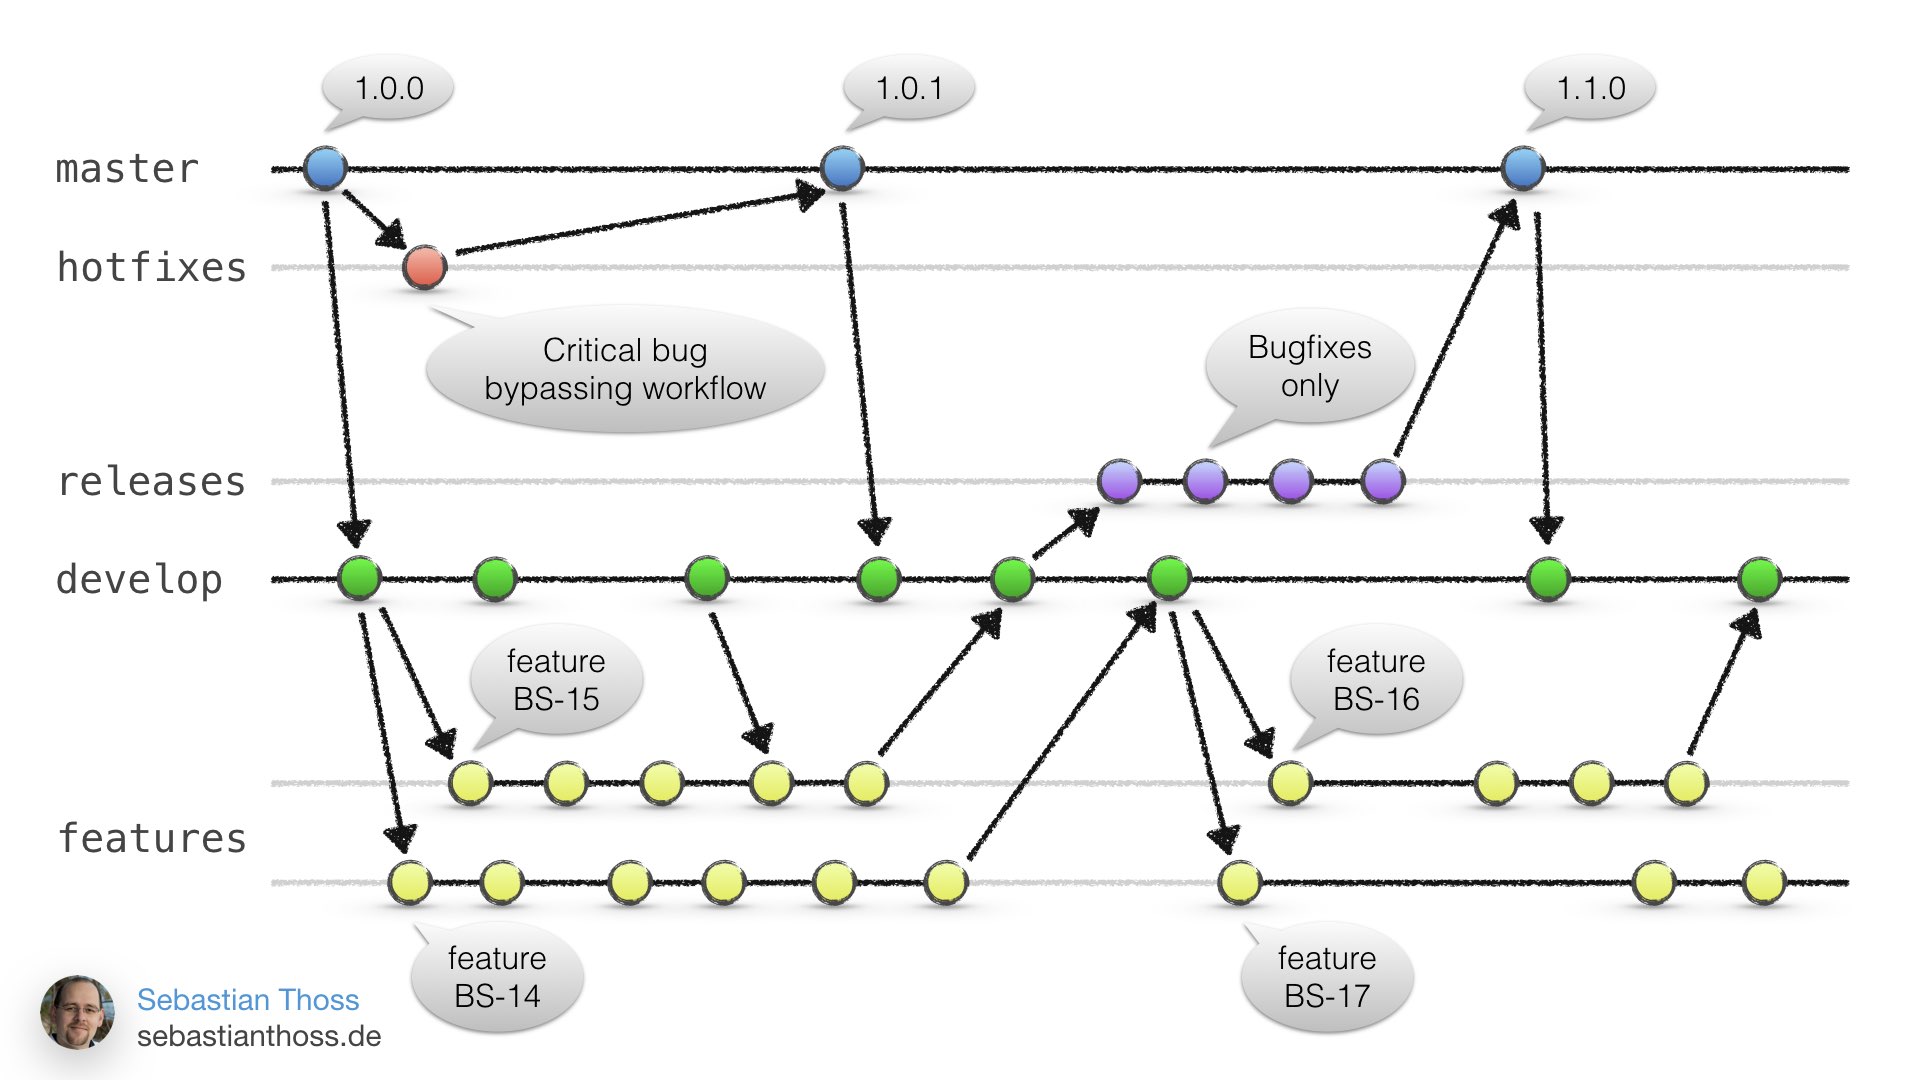
- Make use of branching and merging features to isolate and manage changes, making it easier to collaborate and maintain a stable codebase.
Getting Familiar with the GitHub Desktop Interface
The GitHub Desktop interface is designed to be intuitive and user-friendly, allowing developers to easily manage their repositories and collaborate with others. Here is a brief overview of the key features and functions:
- Dashboard: The dashboard provides an overview of your repositories, displaying their status and any recent activity. From here, you can quickly access your repositories, search for projects, and view notifications.
- Repositories: The repositories tab displays a list of all your local and remote repositories. You can create new repositories, clone existing ones, and manage your repository settings from this tab.
- Comparisons: The comparisons tab allows you to view the differences between files and file versions. This is particularly useful when resolving merge conflicts or comparing changes made by different collaborators.
- Pull Requests: The pull requests tab displays any open pull requests for your repositories. You can review, comment on, and merge pull requests directly from this tab, making collaboration more efficient.
- Settings: The settings tab allows you to configure user settings, such as your name and email address, as well as application settings, like the default editor and Git version. You can also manage your SSH keys and connected accounts from this tab.
To navigate the GitHub Desktop application, use the menu bar at the top of the window. The menu bar provides access to various functions, such as file management, repository management, and help resources. To access documentation and seek help, navigate to the “Help” menu and select “GitHub Desktop Help.” This will open the official GitHub Desktop documentation in your web browser, where you can find detailed information on using the application and troubleshooting common issues.
Basic Git and GitHub Workflows
Git and GitHub workflows are essential for version control and collaboration in software development. Familiarize yourself with these fundamental workflows to make the most of GitHub for Windows:
- Committing Changes: A commit is a snapshot of your code at a particular point in time. To commit changes, make modifications to your files, stage the changes, and then enter a commit message describing the changes. This allows you to track your progress and revert to previous versions if needed. Use the command “git commit -m ‘commit message'” to commit your changes.
- Pulling Updates: When collaborating with others, it’s essential to stay up-to-date with their changes. To pull updates from a remote repository, use the command “git pull origin branch\_name”. This fetches the latest changes from the remote repository and merges them into your local repository.
- Pushing to Remote Repositories: To share your changes with others, you need to push your commits to a remote repository. Use the command “git push origin branch\_name” to push your commits to the remote repository. This makes your changes available to other collaborators and ensures that everyone is working with the most recent version of the code.
Here’s an example of how to use these workflows in practice:
- Clone an existing repository to your local machine.
- Make changes to a file and stage the changes.
- Commit the changes with a descriptive commit message.
- Pull updates from the remote repository to ensure your local repository is up-to-date.
- Resolve any merge conflicts that may arise.
- Push your commits to the remote repository, sharing your changes with other collaborators.
By mastering these basic Git and GitHub workflows, you’ll be well on your way to efficiently managing your projects and collaborating with others on GitHub for Windows.
Collaboration and Code Review
GitHub for Windows offers powerful collaboration and code review features, enabling developers to work together more efficiently. Here’s how to make the most of these features:
Inviting Collaborators
To invite collaborators to a repository, navigate to the repository in GitHub Desktop and click the “Collaborators” tab. Enter the email address associated with the GitHub account of the person you want to invite, and choose their access level (read or write). Click “Invite” to send the invitation.
Managing Branch Permissions
To manage branch permissions, navigate to the repository in GitHub Desktop and click the “Settings” tab. Under the “Branches” section, you can specify branch protection rules, such as requiring status checks before merging or restricting who can push to matching branches. This helps maintain a stable codebase and ensures that all changes are reviewed and tested before being merged.
Conducting Code Reviews
Code reviews can be conducted directly within GitHub Desktop by using the “Pull Requests” tab. When a pull request is opened, you can view the changes, leave comments, and approve or request modifications. This streamlined process encourages open communication, promotes best practices, and helps maintain high-quality code.
To maintain a productive and efficient collaboration workflow, consider these tips:
- Communicate openly and frequently with your team.
- Assign clear responsibilities and tasks to each collaborator.
- Establish coding standards and best practices for your project.
- Regularly review and merge pull requests to keep the codebase up-to-date.
- Encourage constructive feedback and continuous improvement.
By leveraging the collaboration and code review features in GitHub for Windows, you can enhance teamwork, improve code quality, and streamline your software development process.

Troubleshooting and Common Issues
While installing and using GitHub for Windows, you may encounter some common issues. Here are solutions to address these problems and resources for further assistance and support:
Installation Errors
If you encounter installation errors, ensure that your system meets the necessary software and hardware specifications. Try running the installer as an administrator or temporarily disabling antivirus software. If issues persist, consult the official GitHub Desktop documentation or the GitHub Community Forum for assistance.
Configuration Issues
Configuration issues may arise due to incorrect user settings or misconfigured repositories. Double-check your settings and refer to the official GitHub Desktop documentation for guidance on best practices. If necessary, reset your configuration to the default settings or create a new repository to start fresh.
Connectivity Problems
Connectivity problems can occur due to network issues, firewalls, or proxy settings. Ensure that your network connection is stable and that no firewalls or proxy settings are blocking GitHub Desktop. Consult the official GitHub Desktop documentation for information on configuring network settings and troubleshooting connectivity issues.
For further assistance and support, consider the following resources:
- Official GitHub Desktop Documentation: https://docs.github.com/en/github/desktop
- GitHub Community Forum: https://github.community/
- GitHub Support: https://support.github.com/
By understanding how to troubleshoot common issues and utilizing available resources, you can ensure a smooth and efficient experience when using GitHub for Windows.