
An Overview of Docker and Docker Compose
Docker and Docker Compose are powerful tools that simplify the process of creating, deploying, and running applications using containers. Containers are lightweight, standalone, and executable packages that include everything needed to run an application, such as code, libraries, system tools, and settings. By utilizing containers, developers can ensure consistent application behavior across different computing environments. Docker is an open-source platform that enables the creation, deployment, and management of applications packaged as containers. It streamlines the development lifecycle, allowing developers to focus on writing code rather than worrying about compatibility issues.
Docker Compose, on the other hand, is a tool for defining and running multi-container Docker applications. It allows developers to create a YAML file, known as a “docker-compose.yml” file, which describes the services, networks, and volumes required to run the application. By using Docker Compose, developers can manage multiple containers as a single entity, making it easier to scale, update, and maintain applications.

System Requirements for Installing Docker and Docker Compose
Before installing Docker and Docker Compose, it is essential to ensure that your system meets the necessary requirements. The installation process varies depending on the operating system, so it is crucial to understand the specific needs of each platform. For Linux systems, Docker and Docker Compose can be installed on various distributions, such as Ubuntu, Debian, Fedora, and CentOS. The recommended minimum requirements for running Docker on Linux include a 64-bit architecture, 2 GB of RAM, and at least 10 GB of available disk space.
On macOS, Docker Desktop is the preferred method for installing Docker and Docker Compose. The minimum system requirements for macOS are macOS 10.15 or higher, an Intel processor, and at least 4 GB of RAM.

How to Install Docker on Your System
In this section, we will provide a step-by-step guide on how to install Docker on Linux, macOS, and Windows systems. By following these instructions, you will be able to create, deploy, and run applications using containers.
Installing Docker on Linux
For Linux users, we will demonstrate the installation process using Ubuntu as an example. However, the steps are similar for other distributions.
- Update your package list by running the following command:
sudo apt-get update - Install Docker by executing:
sudo apt-get install docker.io - Verify the installation by running:
docker --version
Installing Docker on macOS
To install Docker on macOS, follow these steps:
- Download the latest Docker Desktop version from the official website.
- Open the installer package and follow the on-screen instructions.
- Launch Docker Desktop from your Applications folder.
- Verify the installation by running:
docker --versionin your terminal.
Installing Docker on Windows
For Windows users, follow these steps to install Docker:
- Visit the official Docker website and download Docker Desktop for Windows.
- Run the installer and follow the on-screen instructions.
- Launch Docker Desktop from the Start menu.
- Verify the installation by running:
docker --versionin your command prompt.

Verifying the Docker Installation
After successfully installing Docker on your system, it is essential to verify the installation to ensure everything is working correctly. You can do this by running a few basic commands and checking the Docker version.
Checking the Docker Service Status
First, you should check the status of the Docker service to ensure it is running. Use the following command:
sudo systemctl is-active dockerIf the service is active and running, you will see an output similar to this:
activeChecking the Docker Version
Next, you can verify the Docker installation by checking the version of Docker installed on your system. Run the following command:
docker --versionThe output should display the Docker version, build number, and platform information, like this:
Docker version 20.10.14, build a224086Running a Test Container
Lastly, you can run a test container to ensure Docker is functioning as expected. Execute the following command:
docker run hello-worldThis command will download a test image and run a container displaying a simple “Hello from Docker!” message. If you see this message, Docker is installed and working correctly on your system.

Understanding Docker Compose and Its Advantages
Docker Compose is a powerful tool for managing multi-container applications. It simplifies the process of defining, running, and scaling applications by allowing developers to define all the necessary services, networks, and volumes in a single YAML file.
Functionality of Docker Compose
Docker Compose uses a YAML file, named docker-compose.yml, to define the application’s services, networks, and volumes. This file specifies the Docker images to use, environment variables, and other configurations. By using this file, developers can easily manage and scale their applications without writing complex Docker commands.
Advantages of Docker Compose
- Efficient resource management: Docker Compose automatically manages resources for each service, ensuring optimal usage and reducing the risk of conflicts.
- Consistent environment: Docker Compose creates a consistent environment for development, testing, and production, ensuring that applications behave predictably across different systems.
- Simplified scaling: Docker Compose makes it easy to scale applications by defining the number of instances for each service in the YAML file.
- Streamlined deployment: Docker Compose simplifies deployment by packaging all the necessary components into a single, self-contained unit.
Docker Compose vs. Manual Docker Commands
While it is possible to manage multi-container applications using manual Docker commands, Docker Compose offers several advantages. It simplifies the process of defining and managing services, networks, and volumes, reducing the risk of errors and inconsistencies. Additionally, Docker Compose makes it easier to scale and deploy applications, improving overall productivity and efficiency.

How to Install Docker Compose on Your System
Docker Compose is a versatile tool for managing multi-container applications, and installing it on your system is a straightforward process. In this section, we will provide a detailed, operating system-specific installation guide for Docker Compose, accompanied by images and helpful tips.
Installing Docker Compose on Linux
For Linux users, you can install Docker Compose using the following steps:
- Run the following command to download the current stable release of Docker Compose:
- Apply executable permissions to the binary:
- Verify the installation by running the following command:
sudo curl -L "https://github.com/docker/compose/releases/download/1.29.2/docker-compose-$(uname -s)-$(uname -m)" -o /usr/local/bin/docker-composesudo chmod +x /usr/local/bin/docker-composedocker-compose --versionInstalling Docker Compose on macOS
For macOS users, you can install Docker Compose using the following steps:
- Download the Docker Compose package from the official Docker Compose GitHub releases page:
Verifying the Docker Compose Installation
After successfully installing Docker Compose on your system, it is essential to verify the installation to ensure everything is working correctly. You can do this by running a simple command and interpreting the output.
Checking the Docker Compose Version
To verify the Docker Compose installation, open your terminal or command prompt and run the following command:
docker-compose --versionThe output should display the version of Docker Compose installed on your system, like this:
Docker Compose version 1.29.2Running a Simple Docker Compose File
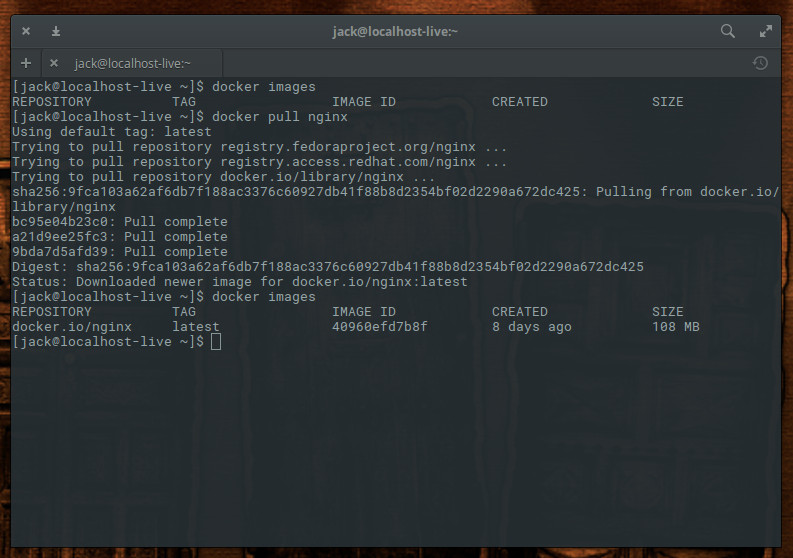
To further confirm the installation, create a simple Docker Compose file named docker-compose.yml with the following content:
version: '3' services: web: image: nginx:latest ports: - "80:80"Save this file in a new directory and run the following command:
docker-compose upThis command will start the Nginx container and make it accessible on your local machine at href="http://localhost/" target="_blank" rel="noopener noreferrer">http://localhost/. Stop the container by pressing Ctrl+C in the terminal.

Getting Started with Docker Compose
Now that you have successfully installed Docker and Docker Compose on your system, it's time to dive into the world of multi-container applications. In this section, we will provide a basic example of a Docker Compose file and demonstrate how to use it to run a multi-container application.
A Basic Docker Compose File Example
Create a new directory for your project and create a file named docker-compose.yml with the following content:
version: '3' services: web: build: . ports: - "5000:5000" redis: image: "redis:alpine"This Docker Compose file defines two services: web and redis. The web service is built from the current directory, and its port 5000 is mapped to the host's port 5000. The redis service uses the official Redis Alpine image.
Creating a Simple Flask Application
In the same directory, create a new file named app.py with the following content:
from flask import Flask app = Flask(__name__) @app.route('/')
def hello_world():
return 'Hello, World!'
if name == 'main':
app.run(host='0.0.0.0', port=5000)
This is a simple Flask application that listens on port 5000 and responds with "Hello, World!" when accessed.
Building and Running the Application with Docker Compose
To build and run the application using Docker Compose, execute the following command in the terminal:
docker-compose upThis command will start both services, and you should see output similar to this:
web_1 | * Running on http://0.0.0.0:5000/ (Press CTRL+C to quit) redis_1 | 1:C 09 Aug 2022 16:20:35.686 # oO0OoO0OoO0Oo Redis is starting oO0OoO0OoO0Oo redis_1 | 1:C 09 Aug 2022 16:20:35.686 # Redis version=6.2.6, bits=64, commit=00000000, modified=0, pid=1, just started redis_1 | 1:C 09 Aug 2022 16:20:35.686 # Warning: no config file specified, using the default config. In order to specify a config file use redis-server /path/to/redis.confAccess the application by visiting http://localhost:5000 in your web browser. The text "Hello, World!" should be displayed.
