Introduction to Power BI and Report Publishing
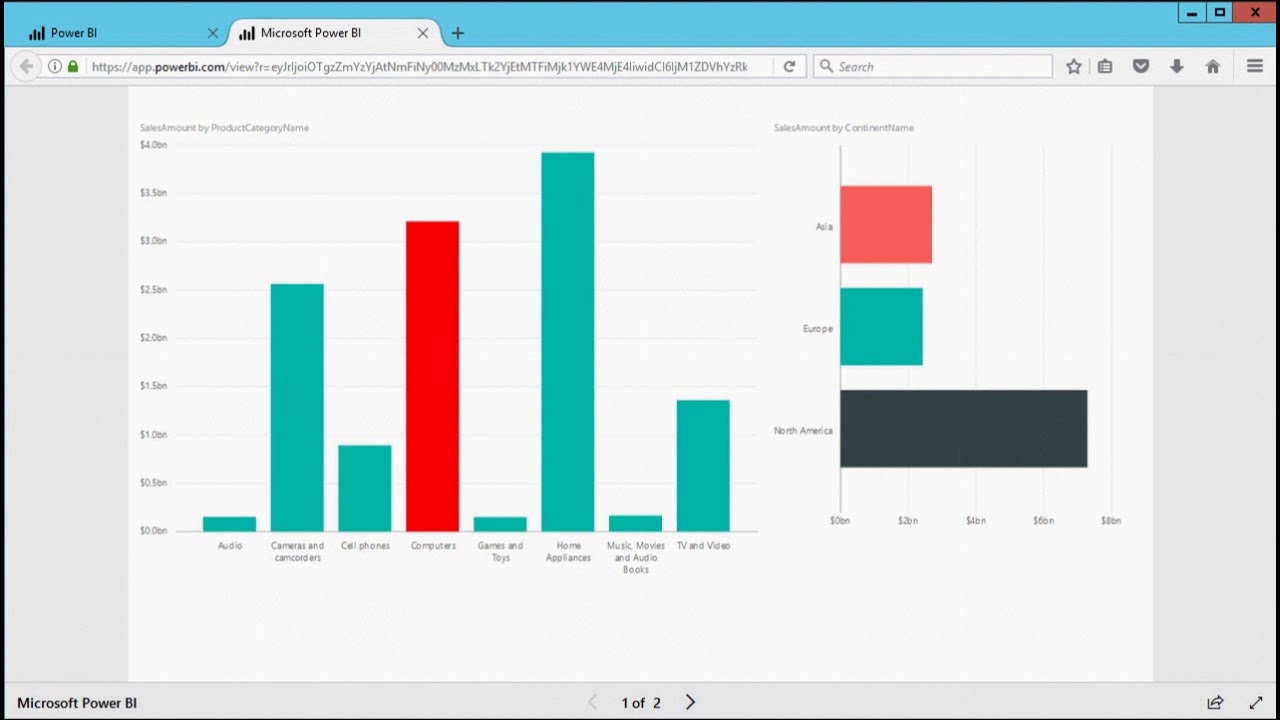
Power BI is a powerful business analytics tool that enables users to transform raw data into interactive and visually appealing reports. Publishing these reports is a crucial step in the data visualization process, as it allows stakeholders to access, analyze, and make informed decisions based on the data. Sharing Power BI reports with the right people at the right time fosters collaboration, enhances communication, and promotes data-driven cultures within organizations.

Creating Power BI Reports: Best Practices and Tips
Creating effective Power BI reports is an essential step in the process of how to publish Power BI reports. By following best practices and tips, you can ensure that your reports are engaging, informative, and tailored to your target audience. Here are some key aspects to consider when creating Power BI reports:
1. Data Preparation
Begin by gathering and cleaning your data from various sources. Ensure that your data is accurate, up-to-date, and relevant to your reporting objectives. Use Power Query in Power BI to transform and shape your data as needed.
2. Visualization Selection
Choose the right visualizations to represent your data effectively. Power BI offers a wide range of visualization types, such as bar charts, line charts, scatter plots, and maps. Consider the story you want to tell with your data and select visualizations that best convey your insights.
3. Formatting and Design
Format your reports with a consistent design and layout. Use themes, fonts, and colors that align with your brand. Ensure that your reports are easy to read and navigate by adding titles, legends, and interactive features like filters and slicers.
4. Target Audience
Understand your target audience and tailor your reports to their needs. Consider their level of expertise, interests, and the questions they want to answer with the data. Use visualizations and language that resonate with your audience to maximize engagement and understanding.
5. Storytelling
Transform your data into a compelling story that engages your audience and encourages action. Use a logical flow, clear headings, and annotations to guide your audience through the insights and help them make informed decisions.

Choosing the Right Publishing Option for Your Power BI Reports
When learning how to publish Power BI reports, it’s essential to understand the various publishing options available. Power BI offers multiple ways to share your reports, each with its unique features, benefits, and limitations. Here are the most common publishing options:
1. Power BI Service
Power BI Service is a cloud-based platform that allows you to store, share, and collaborate on Power BI reports with your team and stakeholders. It offers real-time data updates, seamless integration with other Microsoft services, and easy access to reports via web browsers or mobile devices. However, it may not be suitable for organizations with strict data privacy requirements due to its cloud-based nature.
2. Power BI Report Server
Power BI Report Server is an on-premises solution for publishing and managing Power BI reports. It offers similar functionality to Power BI Service but allows you to maintain full control over your data and infrastructure. Power BI Report Server is ideal for organizations with stringent data security policies or those that cannot store data in the cloud.
3. Embedding in Other Applications
Power BI reports can be embedded in various applications, such as SharePoint, Microsoft Teams, or custom-built solutions. Embedding allows you to leverage Power BI’s data visualization capabilities within your existing workflows and platforms. It’s an excellent option for organizations that want to create a unified and integrated analytics experience for their users.
Choosing the Right Option
When deciding which publishing option to choose, consider the following factors:
- Data privacy and security requirements
- Integration with existing systems and workflows
- Real-time data update needs
- Budget and resources for managing infrastructure
- User experience and accessibility preferences

Preparing Your Power BI Reports for Publishing
Before sharing your Power BI reports with stakeholders, it’s crucial to prepare them properly. This section covers essential steps to ensure your reports are ready for publishing, including data refresh schedules, access permissions, and content packaging. Additionally, testing and validating your reports before sharing them with the intended audience is vital.
1. Data Refresh Schedules
Schedule regular data refreshes to keep your reports up-to-date. Depending on your data sources and requirements, you can set up daily, hourly, or real-time data refreshes. Ensure that your data sources support the chosen refresh schedule and that you have the necessary permissions to access and update the data.
2. Access Permissions
Manage access permissions to control who can view and interact with your reports. You can assign different permission levels to users, such as view-only or edit access. Be cautious when granting edit permissions, as users with these permissions can modify your reports and potentially introduce errors or inconsistencies.
3. Content Packaging
Package your reports, datasets, and dashboards into Power BI apps or workspaces for easy sharing. Organize your content based on the target audience, project, or department. Provide clear instructions and documentation to help users navigate and understand the content.
4. Testing and Validation
Thoroughly test and validate your reports before sharing them. Check for accuracy, consistency, and performance issues. Ensure that all visualizations, filters, and interactions work as expected. Address any issues or discrepancies before sharing your reports to maintain credibility and trust with your stakeholders.

Publishing Power BI Reports to the Power BI Service
Publishing Power BI reports to the Power BI Service allows you to share and collaborate on your reports with stakeholders. This section provides a step-by-step guide on how to publish Power BI reports to the Power BI Service, including creating workspaces, uploading reports, and setting up data connections. Screenshots and visual aids are included to enhance understanding.
1. Create a Workspace
Begin by creating a workspace in the Power BI Service. Workspaces are collaborative spaces where you can store, manage, and share your reports. Click on “Workspaces” in the left-hand menu, then select “Create a workspace” and follow the on-screen instructions.
2. Upload Your Report
Next, upload your Power BI report to the workspace. Click on the workspace where you want to upload your report, then select “Add tiles” > “Add report” and choose the .pbix file from your computer. The report will appear in the workspace, ready for sharing and collaboration.
3. Set Up Data Connections
Ensure that your report’s data connections are properly configured. If your report uses live connections, the data will be refreshed directly from the source. If your report uses imported data, set up a scheduled refresh to keep the data up-to-date. To do this, click on the report, then select “Schedule refresh” and configure the settings as needed.
4. Share Your Report
Now that your report is uploaded and data connections are set up, you can share it with your team or stakeholders. Click on the report, then select “Share” and enter the email addresses of the people you want to share the report with. You can also set permissions, such as view-only or edit access, to control how users interact with the report.
5. Collaborate on Your Report
Encourage collaboration by inviting team members to the workspace and allowing them to contribute to the report. Users with edit permissions can add tiles, modify visualizations, and update the report’s data. This collaborative approach can lead to more insightful and accurate reports, as multiple perspectives and expertise are brought together.
Sharing and Collaborating on Power BI Reports
Sharing and collaborating on Power BI reports is essential for driving data-driven decision-making and fostering a collaborative analytics culture. Power BI offers various methods for sharing and collaborating, such as email subscriptions, embed links, and Power BI apps. This section explains how to manage access permissions and ensure secure collaboration among team members.
1. Email Subscriptions
Email subscriptions allow users to receive report snapshots via email on a regular basis. To set up an email subscription, click on the report, then select “Subscribe” and enter the email addresses of the recipients. You can customize the email subject, frequency, and format (PDF, PowerPoint, or Excel). This feature is useful for keeping stakeholders informed about critical data and insights.
2. Embed Links
Embed links allow you to share a report with users who don’t have a Power BI account or access to the Power BI Service. To create an embed link, click on the report, then select “Share” > “Create embed link.” Copy the generated link and share it with the intended recipients. You can customize the link’s permissions, such as view-only or edit access. This feature is ideal for sharing reports with external partners or clients.
3. Power BI Apps
Power BI apps are curated collections of reports, dashboards, and datasets that can be shared with specific users or groups. To create a Power BI app, click on “Apps” in the left-hand menu, then select “Create app” and follow the on-screen instructions. Apps allow you to package and distribute content to a broader audience, making it easier to manage access permissions and maintain consistency across your organization.
Managing Access Permissions
Managing access permissions is crucial for ensuring secure collaboration on Power BI reports. You can assign different permission levels to users, such as view-only or edit access. Be cautious when granting edit permissions, as users with these permissions can modify your reports and potentially introduce errors or inconsistencies. Regularly review and update access permissions to ensure that only the necessary users have access to your reports.

Publishing Power BI Reports to Power BI Report Server
Power BI Report Server is an on-premises solution for publishing, managing, and sharing Power BI reports within your organization. This section describes the process of publishing Power BI reports to Power BI Report Server, including configuring the server, deploying reports, and managing content. Additionally, it highlights the differences between publishing to Power BI Service and Power BI Report Server.
1. Configuring Power BI Report Server
Before publishing reports to Power BI Report Server, ensure that the server is properly configured. Install and set up the Power BI Report Server software on a suitable server, then configure the necessary settings, such as authentication, data sources, and security.
2. Deploying Reports
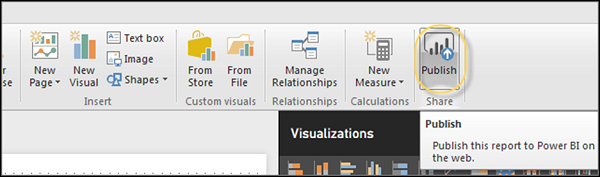
To deploy a Power BI report to the Report Server, open Power BI Desktop and connect to the server using the “Publish to” option in the “Home” tab. Select the destination folder and click “Publish.” The report will be uploaded to the server, and a URL will be generated for accessing the report.
3. Managing Content
Power BI Report Server provides a web-based interface for managing reports and content. After publishing a report, you can access it via the web interface and perform various tasks, such as updating the report, managing access permissions, and creating report snapshots. Regularly review and update your content to ensure it remains accurate and up-to-date.
Differences Between Power BI Service and Power BI Report Server
Power BI Service and Power BI Report Server have several key differences that may influence your decision on which platform to use for publishing Power BI reports:
- Cloud-based vs. on-premises: Power BI Service is a cloud-based solution, while Power BI Report Server is an on-premises solution.
- Data refresh: Power BI Service supports real-time data refresh and scheduled updates, while Power BI Report Server relies on scheduled updates and manual refreshes.
- Collaboration: Power BI Service offers robust collaboration features, such as shared workspaces and real-time commenting, while Power BI Report Server focuses more on individual report consumption and management.
- Integration: Power BI Service integrates seamlessly with other Microsoft cloud services, such as Microsoft Teams and Power Automate, while Power BI Report Server is better suited for on-premises environments and integrating with local systems.
Embedding Power BI Reports in Other Applications
Embedding Power BI reports in other applications can help you reach a broader audience and streamline your analytics workflows. This approach allows you to share data-driven insights with users in the context of their daily tasks, enhancing collaboration and decision-making. This section discusses the benefits of embedding and provides guidance on how to implement this feature effectively.
Benefits of Embedding Power BI Reports
Embedding Power BI reports in other applications offers several advantages:
- Centralized access: Embedding reports in a single application allows users to access all relevant data and insights in one place, improving efficiency and reducing context-switching.
- Seamless integration: Embedding Power BI reports in custom-built solutions or third-party applications can help maintain a consistent user experience and branding.
- Enhanced collaboration: Embedding reports in collaboration platforms, such as Microsoft Teams, can facilitate discussions and decision-making based on data-driven insights.
- Improved security: Embedding reports in specific applications can help ensure that sensitive data is only accessible to authorized users.
Implementing Embedding in Power BI
To embed Power BI reports in another application, follow these steps:
- Publish your Power BI report to the Power BI Service, as described in the Publishing Power BI Reports to the Power BI Service section.
- Generate an embed token for the report using the Power BI REST API or Power BI Embedded. This token authenticates the report and grants access to specific users or groups.
- Embed the report in the target application using an iframe or a supported embedding library. Ensure that the embed token is passed as a parameter to the iframe or library.
- Test the embedded report to ensure that it displays correctly and that users have the appropriate access permissions.
Embedding Best Practices
Consider the following best practices when embedding Power BI reports:
- Ensure that the target application supports iframes or embedding libraries.
- Test the embedded report on various devices and browsers to ensure compatibility.
- Monitor and manage access permissions to maintain security and prevent unauthorized access.
- Regularly update the embedded reports to reflect changes in data sources, visualizations, or formatting.