
What is a Virtual Machine and Why Create One?
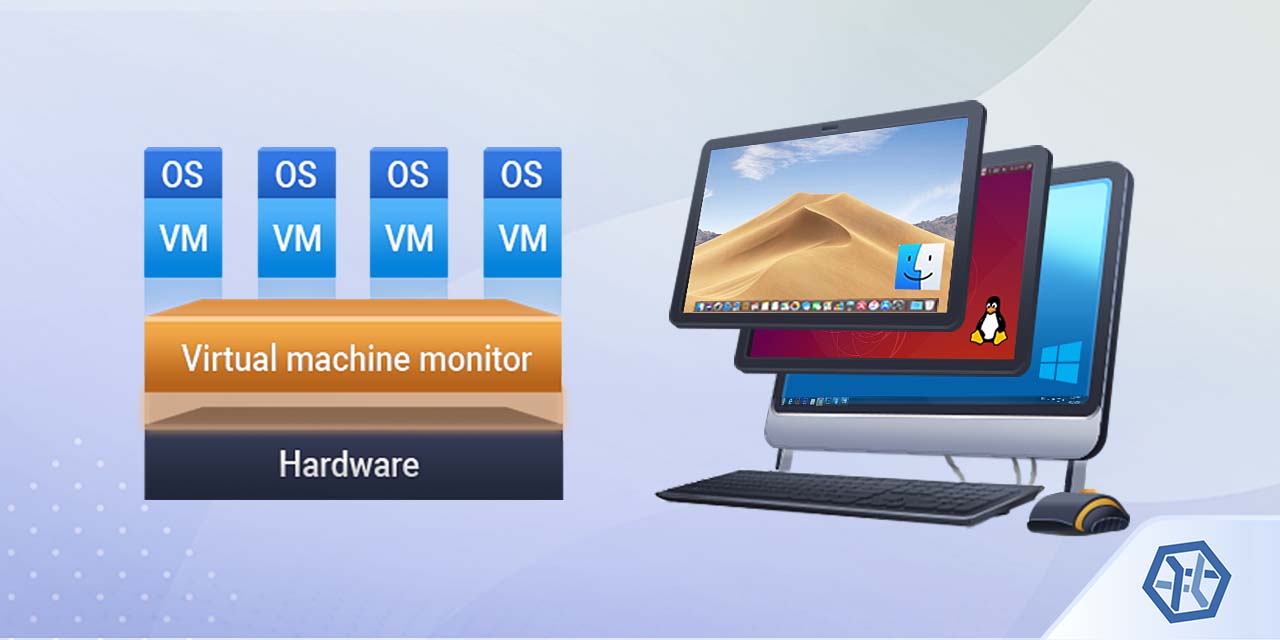
A virtual machine (VM) is a software emulation of a physical computer, capable of executing its own operating system and applications as if it were a standalone device. VMs offer a range of benefits, making them an essential tool for various scenarios. By creating a virtual machine, users can:
- Run multiple operating systems on a single physical machine, maximizing hardware resources and reducing costs.
- Test software applications and configurations in isolated environments, minimizing the risk of affecting the host system.
- Experiment with different operating systems and applications without the need for additional hardware.
- Ensure data security by isolating sensitive applications and data within separate VMs.
To create a virtual machine, users must first understand the prerequisites and select the appropriate virtualization solution. By following the steps outlined in this comprehensive guide, users will be able to create, configure, and manage their own virtual machines, unlocking the full potential of this versatile technology.

Prerequisites for Creating a Virtual Machine
Before diving into the process of creating a virtual machine, it is crucial to ensure that the necessary hardware and software requirements are met. These prerequisites include:
- A Physical Computer with Sufficient Resources: The host machine should have adequate processing power, memory, and storage to run the virtualization software and the guest operating system simultaneously. A general rule of thumb is to allocate at least 50% of the host machine’s resources to the VM.
- Hypervisor or Virtualization Software: A hypervisor or virtualization software is required to create and manage virtual machines. Popular options include VMware, VirtualBox, and Hyper-V. These tools enable the creation of virtual hardware, allowing multiple operating systems to run concurrently on a single physical machine.
- Installation Image for the Desired Guest Operating System: An installation image, such as an ISO file, is necessary to install the guest operating system within the VM. This image can be obtained from the official operating system vendor or a trusted third-party source.
By fulfilling these prerequisites, users can proceed to select the appropriate virtualization solution and begin the process of creating, configuring, and managing their virtual machines.
Selecting the Right Virtualization Solution
Choosing the ideal virtualization platform is a critical step in creating a virtual machine. Popular virtualization solutions include VMware, VirtualBox, and Hyper-V. Each platform has its unique advantages and disadvantages, so users should consider factors like ease of use, performance, compatibility, and pricing when making a decision.
- VMware: VMware is a well-established virtualization solution, offering a range of products for various use cases. VMware Workstation Pro and VMware Fusion are popular choices for desktop virtualization, providing high performance, advanced features, and seamless integration with the host operating system. However, VMware products tend to be more expensive than other virtualization solutions.
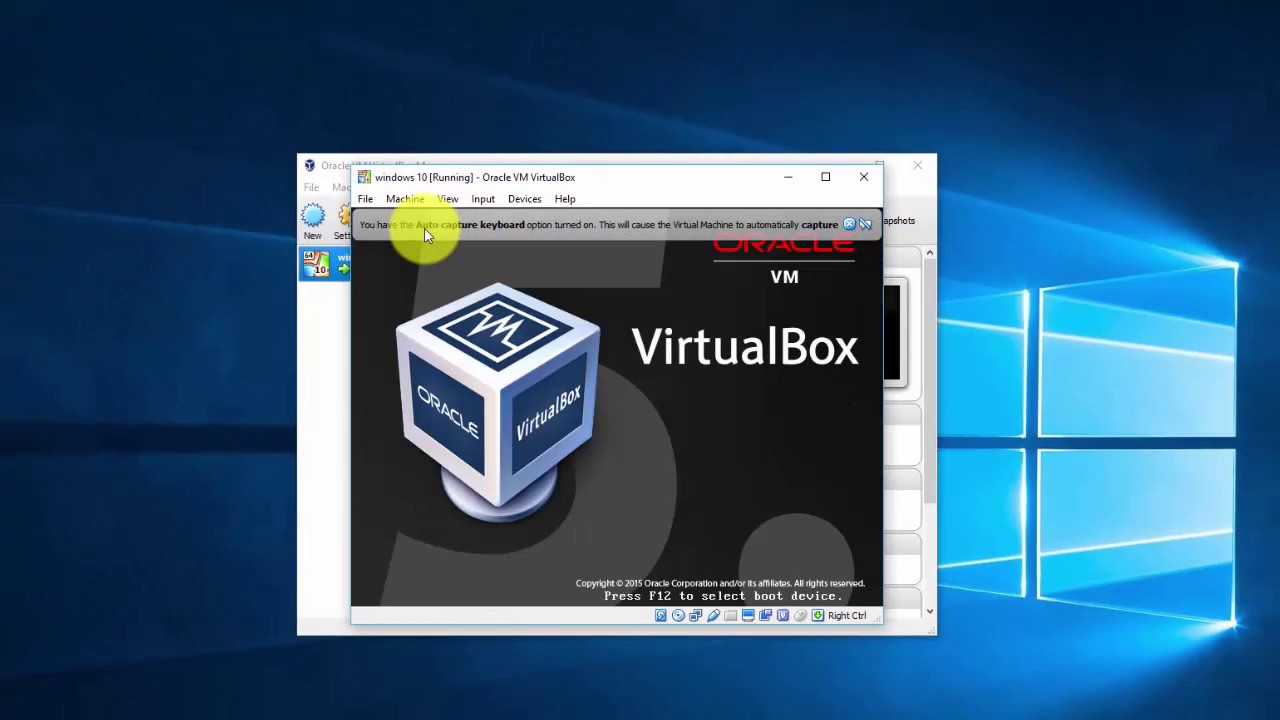
- VirtualBox: VirtualBox is a free, open-source virtualization platform developed by Oracle. It is easy to use, supports a wide range of guest operating systems, and offers features like snapshots, remote display, and USB device support. While VirtualBox is not as performant as VMware, it is an excellent choice for users who require a no-cost virtualization solution.
- Hyper-V: Hyper-V is a native hypervisor developed by Microsoft, included with Windows 10 Pro, Enterprise, and Education editions. It offers good performance, remote management capabilities, and support for Linux guest operating systems. However, Hyper-V lacks some of the advanced features found in VMware and VirtualBox, and it is limited to Windows hosts.
By carefully evaluating these virtualization options, users can select the platform that best meets their needs and begin the process of creating and managing their virtual machines.
Downloading and Installing Virtualization Software
Once the appropriate virtualization solution has been selected, the next step is to download, install, and configure the software on the host machine. The following instructions outline the general process for setting up a virtualization platform, using VMware Workstation Pro as an example:
- Download the Virtualization Software: Visit the VMware website and download the latest version of VMware Workstation Pro. Ensure that the downloaded installer matches the host machine’s operating system (Windows or macOS).
- Install VMware Workstation Pro: Launch the installer and follow the on-screen prompts to install VMware Workstation Pro on the host machine. During the installation process, accept the license agreement, choose the destination folder, and configure any additional settings as desired.
- Launch VMware Workstation Pro: After installation is complete, open VMware Workstation Pro and familiarize yourself with the user interface. Take note of the “Home” screen, which provides access to recently accessed virtual machines, as well as options for creating new VMs and accessing the library of available virtual appliances.
By following these steps, users can successfully download, install, and configure their chosen virtualization software, preparing them to create and manage their virtual machines.
Creating a New Virtual Machine
After downloading, installing, and configuring the virtualization software, the next step is to create a new virtual machine. This process involves configuring hardware settings, allocating resources, and selecting the guest operating system. The following instructions outline the general steps for creating a new VM using VMware Workstation Pro:
- Create a New Virtual Machine: In VMware Workstation Pro, click the “Create a New Virtual Machine” button on the “Home” screen or select “File” > “New Virtual Machine” from the top menu. This will launch the “New Virtual Machine Wizard.”
- Choose the Installation Method: In the “New Virtual Machine Wizard,” select the installation method for the guest operating system. Options include “Installer Disc,” “Installer Image File,” or “ISO Image File.” If using an ISO image file, browse and select the desired image for the guest operating system.
- Configure Virtual Machine Hardware: Customize the VM’s hardware settings, including the number of CPUs, the amount of memory, and the network connection type. It is essential to allocate sufficient resources to ensure optimal performance, but be mindful not to overcommit resources, as this may negatively impact the host machine’s performance.
- Select the Guest Operating System: Choose the guest operating system from the provided list. VMware Workstation Pro supports various operating systems, including Windows, Linux, and macOS. Selecting the correct operating system ensures that VMware Workstation Pro installs the appropriate virtual hardware and provides optimal performance.
- Name and Save the Virtual Machine: Provide a name for the VM and specify the location where it will be saved. VMware Workstation Pro will create a new folder containing all the VM’s files, including the virtual disk, configuration files, and any installed software.
By following these steps, users can create a new virtual machine, preparing them to install the guest operating system and begin utilizing their virtual environment.
:max_bytes(150000):strip_icc()/006-how-to-create-virtual-machine-windows-10-4770680-92c7458377754484a210ca6239a03a80.jpg)
Installing the Guest Operating System
Once the virtual machine has been created, the next step is to install the guest operating system within the VM. This process involves preparing the installation media, booting the VM, and following the OS installation prompts. The following instructions outline the general steps for installing a guest operating system using VMware Workstation Pro:
- Prepare the Installation Media: If the installation media is a physical disc, insert it into the host machine’s optical drive. If using an ISO image file, mount the ISO within the virtualization software. In VMware Workstation Pro, open the VM settings, navigate to the “CD/DVD (SATA)” section, and select the connected ISO image.
- Boot the Virtual Machine: Start the VM and ensure that it boots from the connected installation media. If necessary, press the appropriate key (usually F12, F10, or ESC) during the VM boot process to access the boot menu and select the connected installation media.
- Follow the OS Installation Prompts: Proceed through the guest operating system installation process, providing necessary information such as language preferences, regional settings, and user accounts. Ensure that the allocated resources, such as disk space and network settings, are sufficient for the intended use of the VM.
- Complete the Installation: After the installation is complete, remove the installation media from the VM settings and restart the VM. The guest operating system should now boot normally within the VM.
By following these steps, users can successfully install a guest operating system within their virtual machine, enabling them to utilize the VM for various purposes, such as software testing, application development, or data security.
Customizing and Managing Your Virtual Machine
After installing the guest operating system, it is essential to customize and manage the virtual machine to ensure optimal performance and security. Various tasks, such as configuring network settings, managing storage, and taking VM snapshots, can help users optimize, maintain, and troubleshoot their virtual machines. The following instructions outline the general steps for customizing and managing a VM using VMware Workstation Pro:
Configuring Network Settings
- Access the VM Settings: In VMware Workstation Pro, select the desired VM and click the “Edit Virtual Machine Settings” button.
- Select the Network Adapter: In the VM settings, navigate to the “Network Adapter” section and choose the desired network connection type, such as “NAT,” “Bridged,” or “Host-only.”
- Configure Additional Network Settings: If necessary, customize additional network settings, such as the MAC address, VLAN tagging, or security settings.
Managing Storage
- Access the VM Settings: In VMware Workstation Pro, select the desired VM and click the “Edit Virtual Machine Settings” button.
- Select the Hard Disk: In the VM settings, navigate to the “Hard Disk” section and choose the desired virtual disk file.
- Customize Storage Settings: If necessary, customize storage settings, such as the disk capacity, provisioning type, or disk mode.
Taking VM Snapshots
- Power Off the VM: Ensure that the VM is powered off before taking a snapshot.
- Take a Snapshot: In VMware Workstation Pro, select the desired VM and click the “Take Virtual Machine Snapshot” button. Provide a name and description for the snapshot.
- Restore a Snapshot: To restore a snapshot, power on the VM and click the “Snapshot” button in the VM menu. Select the desired snapshot and click “OK” to restore the VM to the chosen state.
By following these steps, users can effectively customize, maintain, and troubleshoot their virtual machines, ensuring optimal performance and security for their virtual environments.

Additional Tips and Best Practices for Virtual Machines
Virtual machines offer numerous benefits and opportunities for users, but it is essential to employ best practices to ensure optimal performance, security, and efficiency. The following expert advice provides valuable insights on utilizing virtual machines effectively, including utilizing VM templates, enabling remote access, and monitoring VM performance:
Utilizing VM Templates
VM templates simplify the process of creating new virtual machines by providing pre-configured virtual hardware and guest operating system settings. By creating and managing VM templates, users can streamline VM deployment, ensure consistent configurations, and reduce errors.
Enabling Remote Access
Virtualization software often includes remote access capabilities, allowing users to manage and interact with their virtual machines from remote locations. Enabling remote access enables users to access their VMs from various devices and locations, enhancing productivity and flexibility.
Monitoring VM Performance
Monitoring VM performance is crucial for identifying potential issues, optimizing resource allocation, and ensuring smooth operation. Users should regularly monitor VM resource utilization, such as CPU, memory, and storage, and adjust settings accordingly. Various tools and utilities are available for monitoring VM performance, including built-in virtualization software tools and third-party applications.
Implementing Data Security Measures
Virtual machines provide an additional layer of data security by isolating guest operating systems and applications from the host machine. However, users should still implement robust security measures, such as firewalls, antivirus software, and access controls, to protect their VMs and data from potential threats.
Regularly Updating Virtualization Software
Regularly updating virtualization software is essential for maintaining optimal performance, addressing security vulnerabilities, and accessing new features. Users should routinely check for and install updates to ensure their virtualization software is up-to-date and secure.
By following these additional tips and best practices, users can maximize the potential of their virtual machines, ensuring efficient, secure, and flexible virtual environments.
