
What is the EC2 Management Console?
The AWS EC2 Management Console is a web-based interface designed to manage Amazon Elastic Compute Cloud (EC2) resources. As a key component of Amazon Web Services (AWS), the EC2 Management Console provides users with the capability to handle computing capacity in the cloud. This powerful tool enables users to launch, monitor, and manage instances, configure security groups, and track resource usage, all from an intuitive and user-friendly dashboard.

Key Features of the EC2 Management Console
The AWS EC2 Management Console offers a wide range of features that simplify the management and scaling of computing capacity in the cloud. Here are some of the key features that make the EC2 Management Console an indispensable tool for managing EC2 resources:
- Launching, connecting, and managing instances: The EC2 Management Console provides a simple and intuitive interface for launching, connecting, and managing instances. Users can quickly launch new instances, connect to existing instances, and manage their lifecycle, all from a single dashboard.
- Configuring security groups: Security groups are an essential aspect of EC2 instance security. The EC2 Management Console allows users to create and configure security groups, controlling inbound and outbound traffic to instances. Users can define rules based on IP addresses, protocols, and ports, ensuring their instances are secure and accessible only to authorized users.
- Monitoring resource usage: The EC2 Management Console provides real-time monitoring of resource usage, including CPU, memory, network, and storage utilization. Users can view this information in graphical or tabular format, making it easy to identify trends, optimize resource allocation, and avoid unexpected charges.
- Creating and managing Amazon Machine Images (AMIs): AMIs are pre-configured templates that can be used to launch new instances quickly. The EC2 Management Console allows users to create, manage, and share their own AMIs, as well as access a wide range of community AMIs.
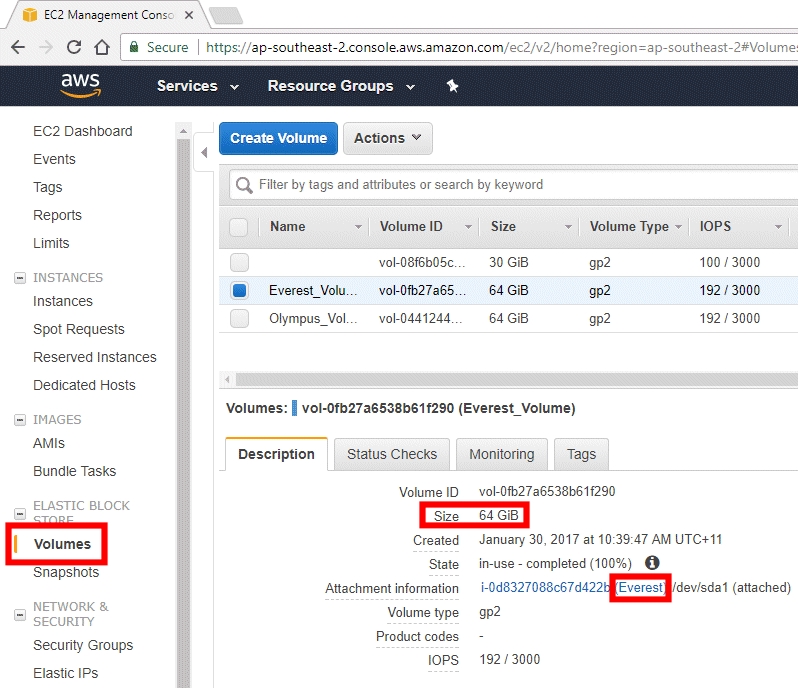
- Managing Elastic Block Store (EBS) volumes: EBS volumes are network-attached storage devices that can be attached to EC2 instances. The EC2 Management Console provides a simple interface for creating, managing, and connecting EBS volumes to instances, ensuring data persistence and availability.
- Setting up and managing Identity and Access Management (IAM) roles: IAM roles allow users to delegate access to AWS services and resources securely. The EC2 Management Console provides a simple interface for creating, managing, and assigning IAM roles to instances, ensuring secure access to AWS resources.
By leveraging these powerful features, the EC2 Management Console simplifies the management and scaling of computing capacity in the cloud, enabling users to focus on building and deploying their applications with ease.
How to Access the EC2 Management Console
To access the EC2 Management Console, you must first have an Amazon Web Services (AWS) account. If you don’t already have one, you can create a new account on the AWS website. Once you have an account, follow these steps:
-
Navigate to the AWS Management Console by entering the URL in your web browser.
-
Enter your AWS account email address and password to log in.
-
From the list of services, select “EC2” under the “Compute” category. This will take you to the EC2 Dashboard, where you can manage your EC2 resources.
It’s important to note that you may need to select a specific region from the top-right corner of the EC2 Dashboard, as EC2 resources are specific to a particular region.
Once you have accessed the EC2 Management Console, you can begin managing and scaling your computing capacity in the cloud.
Getting Started with the EC2 Management Console
Now that you have access to the EC2 Management Console, it’s time to set up your computing environment. Here’s a step-by-step guide to get you started:
-
Create a Key Pair: A key pair is a set of security credentials that you use to securely connect to your instances. To create a new key pair, click on the “Key Pairs” option in the EC2 Dashboard, then click “Create Key Pair”. Enter a name for your key pair, then click “Create”. Your key pair will be downloaded to your computer. Keep it safe, as you will need it to connect to your instances.
-
Choose an Amazon Machine Image (AMI): An AMI is a pre-configured virtual machine image that you can use to launch an instance. The EC2 Management Console provides a variety of AMIs to choose from, including free and paid options. To choose an AMI, click on the “Launch Instance” button, then select the AMI that best meets your needs.
-
Configure Security Groups: A security group is a virtual firewall that controls inbound and outbound traffic to your instances. When you launch a new instance, it is automatically assigned to the default security group. However, you can create new security groups or modify the rules for existing security groups. To configure security groups, click on the “Security Groups” option in the EC2 Dashboard, then click “Create Security Group”. Enter a name and description for your security group, then add rules to control traffic.
Once you have completed these steps, you are ready to launch your first instance. Simply click on the “Launch” button, select the instance type, and follow the prompts to complete the launch process.
Managing EC2 Instances with the EC2 Management Console
The EC2 Management Console provides a user-friendly web-based interface for managing Amazon Elastic Compute Cloud (EC2) instances. With this tool, users can easily start, stop, terminate, and monitor their instances. This article will guide you through managing EC2 instances using the EC2 Management Console.
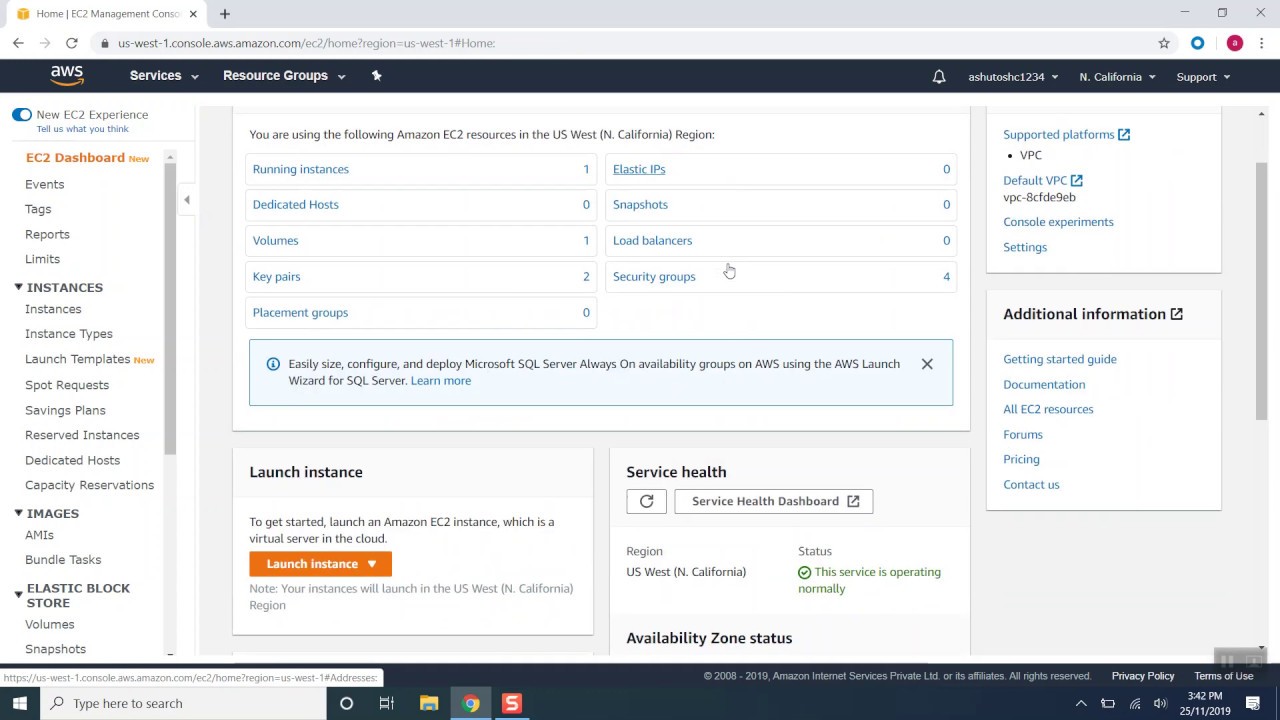
To begin, navigate to the EC2 Dashboard within the AWS Management Console. On the EC2 Dashboard, you will find a list of your instances, along with their current status, instance type, and other relevant information.
Starting an EC2 Instance
To start an EC2 instance, follow these steps:
From the EC2 Dashboard, click on the “Instances” option in the left-hand navigation menu.
In the “Instances” section, click the “Actions” dropdown menu.
Select “Start” from the list of available options.
In the “Start Instances” dialog box, choose the desired instance type and click “Yes, Start.”
Stopping an EC2 Instance
To stop an EC2 instance, follow these steps:
From the EC2 Dashboard, click on the “Instances” option in the left-hand navigation menu.
In the “Instances” section, click the “Actions” dropdown menu.
Select “Stop” from the list of available options.
In the “Stop Instances” dialog box, confirm your selection by clicking “Yes, Stop.”
Terminating an EC2 Instance
To terminate an EC2 instance, follow these steps:
From the EC2 Dashboard, click on the “Instances” option in the left-hand navigation menu.
In the “Instances” section, click the “Actions” dropdown menu.
Select “Terminate” from the list of available options.
In the “Terminate Instances” dialog box, confirm your selection by clicking “Yes, Terminate.”
Monitoring EC2 Instances
To monitor EC2 instances, follow these steps:
From the EC2 Dashboard, click on the “Instances” option in the left-hand navigation menu.
In the “Instances” section, you can view the current status of each instance, including its state, instance type, and public IP address.
To view more detailed information about an instance, click on its instance ID.
By mastering these EC2 Management Console features, you can effectively manage and scale your computing capacity in the cloud. Remember to always monitor your instances and ensure they are configured correctly for optimal performance.
Configuring Security Groups in the EC2 Management Console
Security groups are virtual firewalls that control inbound and outbound traffic to your EC2 instances. Configuring security groups in the EC2 Management Console is crucial for ensuring the security of your cloud resources. This article will guide you through the process of configuring security groups in the EC2 Management Console.
Creating a Security Group
To create a security group, follow these steps:
- From the EC2 Dashboard, click on the “Security Groups” option in the left-hand navigation menu.
- Click the “Create security group” button.
- In the “Create security group” dialog box, provide a name and description for the security group, select the relevant VPC, and click “Create.”
Configuring Inbound Rules
To configure inbound rules for a security group, follow these steps:
- From the EC2 Dashboard, click on the “Security Groups” option in the left-hand navigation menu.
- Select the security group you want to configure.
- Click the “Edit inbound rules” button.
- In the “Edit inbound rules” dialog box, specify the type of traffic, protocol, port range, and source for the inbound rules. You can also specify the IP address or range of IP addresses from which the traffic will be allowed.
- Click “Save rules” to apply the changes.
Configuring Outbound Rules
To configure outbound rules for a security group, follow these steps:
- From the EC2 Dashboard, click on the “Security Groups” option in the left-hand navigation menu.
- Select the security group you want to configure.
- Click the “Edit outbound rules” button.
- In the “Edit outbound rules” dialog box, specify the type of traffic, protocol, port range, and destination for the outbound rules. You can also specify the IP address or range of IP addresses to which the traffic will be allowed.
- Click “Save rules” to apply the changes.
By following these steps, you can effectively configure security groups in the EC2 Management Console and ensure the security of your cloud resources. Remember to always review and update your security group rules regularly to maintain the security of your instances.
Best Practices for Using the EC2 Management Console
The EC2 Management Console is a powerful tool for managing and scaling computing capacity in the cloud. To get the most out of the EC2 Management Console, it’s essential to follow best practices. This article will provide tips and best practices for using the EC2 Management Console, such as using tags for organizing resources, setting up billing alerts, and utilizing the EC2 Command Line Interface (CLI) for automation.
Using Tags for Organizing Resources
Tags are metadata that you can attach to your EC2 resources to make it easier to manage and organize them. By using tags, you can categorize resources based on various criteria, such as cost center, environment, or team. To add tags to your EC2 resources, follow these steps:
- From the EC2 Dashboard, click on the “Resources” option in the left-hand navigation menu.
- Select the resource you want to tag.
- Click the “Actions” dropdown menu and select “Add/Edit Tags.”
- In the “Add/Edit Tags” dialog box, provide the tag key and value, and click “Save.”
Setting Up Billing Alerts
Billing alerts help you monitor your AWS spending and avoid unexpected charges. To set up billing alerts, follow these steps:
- Log in to the AWS Billing Console.
- Click on the “Bills” option in the left-hand navigation menu.
- Click the “Create alert” button.
- In the “Create Alert” dialog box, specify the threshold amount, alert type, and email recipients, and click “Create.”
Utilizing the EC2 Command Line Interface (CLI)
The EC2 Command Line Interface (CLI) is a powerful tool for automating EC2 tasks. By using the EC2 CLI, you can perform various tasks, such as launching instances, creating security groups, and managing volumes. To get started with the EC2 CLI, follow these steps:
- Install the AWS CLI on your local machine.
- Configure the AWS CLI with your access key and secret access key.
- Run the EC2 CLI commands to manage your EC2 resources.
By following these best practices, you can effectively use the EC2 Management Console to manage and scale your computing capacity in the cloud. Remember to always monitor your resources, set up billing alerts, and utilize the EC2 CLI for automation to optimize your cloud infrastructure.

Troubleshooting Common Issues in the EC2 Management Console
Using the EC2 Management Console can sometimes result in common issues, such as connection errors, timeouts, and configuration problems. This article will address these issues and provide solutions for resolving them.
Connection Errors
Connection errors can occur when trying to access the EC2 Management Console. To troubleshoot connection errors, follow these steps:
- Check your internet connection and ensure that you can access other AWS services.
- Verify that you are using the correct URL to access the EC2 Management Console.
- Check your browser settings and ensure that cookies and JavaScript are enabled.
- Clear your browser cache and try accessing the EC2 Management Console again.
Timeouts
Timeouts can occur when performing actions in the EC2 Management Console. To troubleshoot timeouts, follow these steps:
- Check your internet connection and ensure that you have a stable and fast connection.
- Verify that you are not performing too many actions simultaneously, which can cause timeouts.
- Check the AWS Service Health Dashboard to ensure that there are no service disruptions or outages.
Configuration Problems
Configuration problems can occur when configuring resources in the EC2 Management Console. To troubleshoot configuration problems, follow these steps:
- Verify that you have followed the correct steps for configuring the resource.
- Check the resource’s documentation and ensure that you have not missed any critical steps.
- Review the resource’s configuration and ensure that it meets the requirements.
- Check the EC2 Management Console logs for any error messages or warnings.
By following these troubleshooting steps, you can resolve common issues in the EC2 Management Console and ensure that your resources are configured correctly. Remember to always monitor your resources and check for any error messages or warnings to maintain the health and stability of your cloud infrastructure.
