What is Docker and Why Use it on Ubuntu?
Docker is a popular containerization platform that allows developers and system administrators to package applications and their dependencies into a single container. This container can then be deployed consistently across different environments, from development to production. Docker on Ubuntu is a powerful combination that offers several benefits, including resource efficiency, portability, and consistency.
Resource efficiency is achieved through Docker’s ability to share the host system’s resources, such as the kernel, with multiple containers. This means that each container does not need to have its own operating system, resulting in a smaller footprint and reduced resource usage. Portability is another benefit of using Docker on Ubuntu. Containers can be easily moved from one host to another, making it simple to scale applications and migrate them to different environments.
Consistency is also a key advantage of using Docker on Ubuntu. Containers ensure that applications are run in a consistent environment, regardless of the underlying infrastructure. This makes it easier to manage and maintain applications, as developers can be confident that their code will run the same way every time. Additionally, Docker on Ubuntu allows for easy collaboration between teams, as containers can be shared and reused across different projects and environments.
In summary, Docker on Ubuntu is a powerful combination that offers resource efficiency, portability, and consistency. By using Docker on Ubuntu, developers and system administrators can package applications and their dependencies into a single container, making it easier to deploy and manage applications across different environments.
System Requirements and Installation of Docker on Ubuntu
Before installing Docker on Ubuntu, it is essential to ensure that your system meets the necessary hardware and software specifications. Docker requires a 64-bit architecture and at least 2GB of RAM. Additionally, Docker is compatible with Ubuntu 18.04 LTS, 20.04 LTS, and 21.04.
To install Docker on Ubuntu, follow these steps:
- Update the package index on your Ubuntu system by running the following command in the terminal:
sudo apt-get update - Install Docker by running the following command in the terminal:
sudo apt-get install docker.io - Start and enable Docker to start automatically on boot by running the following commands in the terminal:
sudo systemctl start docker sudo systemctl enable docker - Verify that Docker is installed and running by running the following command in the terminal:
sudo systemctl status docker Congratulations, you have successfully installed Docker on Ubuntu! You can now start using Docker on Ubuntu to containerize your applications and improve their portability, resource efficiency, and consistency.
How to Use Docker on Ubuntu: Basic Commands and Operations
Now that you have successfully installed Docker on Ubuntu, it’s time to learn how to use it. In this section, we will cover some basic Docker commands and operations that you can use to manage your Docker containers.
Pulling an Image
The first step in using Docker is to pull an image from the Docker Hub. An image is a lightweight, standalone, and executable package that includes everything needed to run a piece of software, including the code, a runtime, libraries, environment variables, and config files. To pull an image, use the following command:
docker pull <image-name> For example, to pull the official Nginx image, run the following command:
docker pull nginx Running a Container
Once you have pulled an image, you can use it to run a container. A container is a runtime instance of an image. To run a container, use the following command:
docker run -d -p <host-port>:<container-port> <image-name> For example, to run an Nginx container that listens on port 80 and maps it to port 8080 on the host machine, run the following command:
docker run -d -p 8080:80 nginx Stopping a Container
To stop a running container, use the following command:
docker stop <container-id> For example, to stop the Nginx container that we ran earlier, run the following command:
docker stop <container-id> Removing a Container
To remove a stopped container, use the following command:
docker rm <container-id> For example, to remove the Nginx container that we stopped earlier, run the following command:
docker rm <container-id> These are just a few basic Docker commands and operations that you can use on Ubuntu. With these commands, you can pull images, run containers, stop containers, and remove containers. As you become more comfortable with Docker, you can explore more advanced features and capabilities.
Managing Docker Containers on Ubuntu: Starting, Stopping, and Removing
Once you have created and run a Docker container on Ubuntu, you may need to manage it by starting, stopping, and removing it. In this section, we will discuss how to manage Docker containers on Ubuntu.
Starting a Container
To start a container that was previously stopped, use the following command:
docker start <container-id> For example, to start the Nginx container that we stopped earlier, run the following command:
docker start <container-id> Stopping a Container
To stop a running container, use the following command:
docker stop <container-id> For example, to stop the Nginx container that we started earlier, run the following command:
docker stop <container-id> Restarting a Container
To restart a container, use the following command:
docker restart <container-id> For example, to restart the Nginx container that we stopped earlier, run the following command:
docker restart <container-id> Removing a Container
To remove a stopped container, use the following command:
docker rm <container-id> For example, to remove the Nginx container that we stopped earlier, run the following command:
docker rm <container-id> By mastering these basic Docker container management commands, you can effectively manage your Docker containers on Ubuntu. Remember to always ensure that you have stopped and removed any unused containers to free up system resources.
Docker Volumes and Networking on Ubuntu: Data Persistence and Communication
As you start working with Docker containers on Ubuntu, you will quickly realize that data persistence and communication between containers can be challenging. In this section, we will discuss how to use Docker volumes and networking on Ubuntu to ensure data persistence and communication between containers.
Docker Volumes on Ubuntu
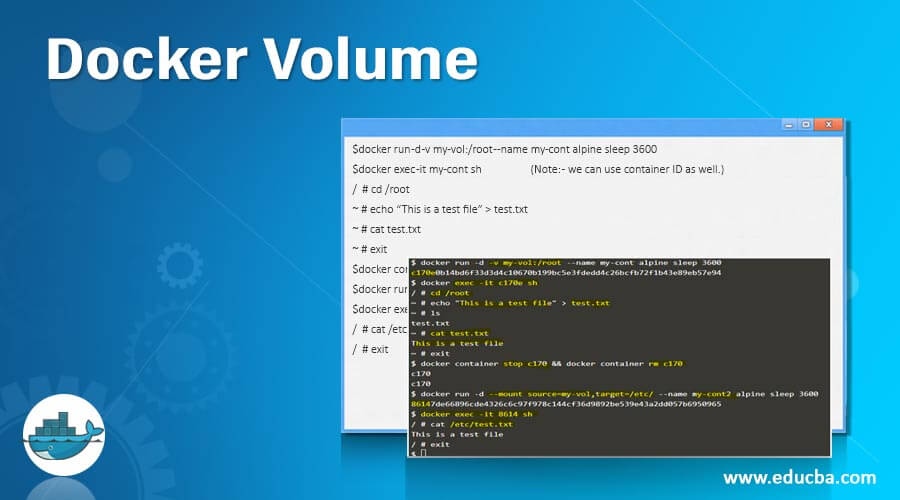
Docker volumes allow you to persist data generated by your containers, even after the container is stopped or removed. To create a volume on Ubuntu, use the following command:
docker volume create <volume-name> For example, to create a volume named “nginx-volume,” run the following command:
docker volume create nginx-volume To mount the volume to a container, use the “-v” flag when running the container. For example, to run an Nginx container with the “nginx-volume” mounted, use the following command:
docker run -d -p 80:80 -v nginx-volume:/usr/share/nginx/html nginx Docker Networking on Ubuntu
Docker networking allows you to communicate between containers running on the same host. To create a network on Ubuntu, use the following command:
docker network create <network-name> For example, to create a network named “nginx-network,” run the following command:
docker network create nginx-network To connect a container to the network, use the “–network” flag when running the container. For example, to run an Nginx container connected to the “nginx-network,” use the following command:
docker run -d -p 80:80 --network nginx-network nginx By mastering Docker volumes and networking on Ubuntu, you can ensure data persistence and communication between containers. Remember to always ensure that your volumes and networks are properly configured to avoid data loss and communication issues.
Building Docker Images on Ubuntu: Creating Custom Containers
Once you have gained some experience using Docker on Ubuntu, you may want to start building your own custom containers. In this section, we will discuss how to build Docker images on Ubuntu, including creating a Dockerfile and using multi-stage builds.
Creating a Dockerfile
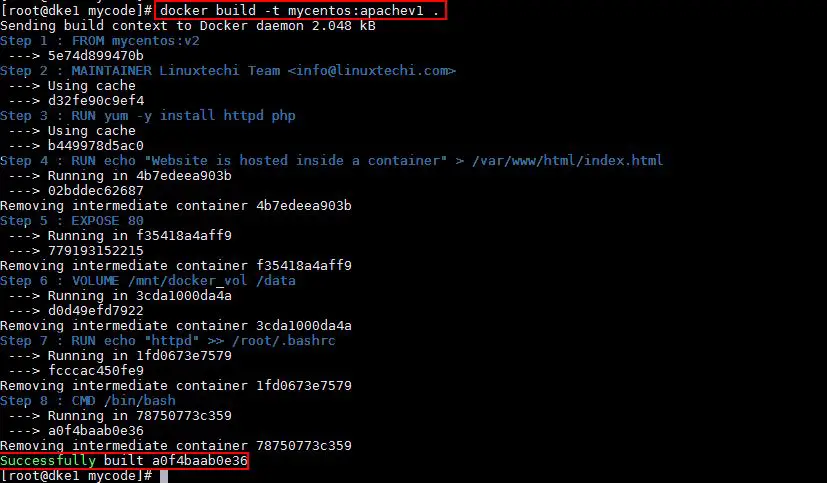
A Dockerfile is a script that contains instructions for building a Docker image. To create a Dockerfile, create a new file named “Dockerfile” in a directory of your choice. Then, add the necessary instructions to the file. Here is an example Dockerfile that installs Nginx:
FROM ubuntu:latest RUN apt-get update && apt-get install -y nginx EXPOSE 80 CMD ["nginx", "-g", "daemon off;"] This Dockerfile starts with the “ubuntu:latest” base image, installs Nginx, exposes port 80, and starts the Nginx service.
Building a D
Docker Compose on Ubuntu: Managing Multi-Container Applications
As your Docker skills grow, you may find yourself working with multi-container applications. Managing multiple containers can be complex and time-consuming, but Docker Compose can help. Docker Compose is a tool for defining and running multi-container Docker applications. In this section, we will discuss how to use Docker Compose on Ubuntu, including creating a docker-compose.yml file and starting/stopping services.
Creating a Docker Compose File
To use Docker Compose, you need to create a docker-compose.yml file. This file contains the configuration for your application’s services, including the Docker images to use, network settings, and environment variables. Here is an example docker-compose.yml file that runs a simple web application:
version: '3' services: web: build: . ports: - "5000:5000" volumes: - .:/code depends\_on: - db db: image: postgres environment: POSTGRES\_PASSWORD: example This docker-compose.yml file defines two services: “web” and “db”. The “web” service builds an image from the Dockerfile in the current directory, exposes port 5000, mounts the current directory as a volume, and depends on the “db” service. The “db” service uses the “postgres” image and sets an environment variable for the database password.
Starting and Stopping Services
Once you have created your docker-compose.yml file, you can use the following commands to start and stop your services:
docker-compose up -d docker-compose down “docker-compose up -d” starts your services in detached mode, meaning they run in the background. “docker-compose down” stops and removes your services.
By mastering Docker Compose on Ubuntu, you can simplify the management of multi-container applications. Remember to always ensure that your docker-compose.yml file is correctly configured to avoid issues with your services.
Troubleshooting Docker on Ubuntu: Common Issues and Solutions
While Docker on Ubuntu is a powerful tool, it’s not without its challenges. In this section, we will discuss some common issues that may arise when using Docker on Ubuntu and provide solutions for each issue. We will also provide tips on how to troubleshoot and debug Docker containers and images on Ubuntu.
Error Pulling Docker Images
If you encounter an error when pulling a Docker image, it may be due to a connectivity issue or a problem with the Docker registry. To troubleshoot this issue, first check your internet connection and try pulling the image again. If the issue persists, try pulling the image from a different registry or check the Docker registry’s status.
Container Won’t Start
If a container won’t start, it may be due to a misconfiguration or a problem with the container’s image. To troubleshoot this issue, first check the container’s logs using the “docker logs” command. If the logs don’t provide enough information, try running the container with the “–entrypoint” flag and specify a shell command to run inside the container. This can help you determine if the issue is with the container’s image or a misconfiguration.
Data Persistence Issues
If you’re having issues with data persistence in Docker on Ubuntu, it may be due to a problem with Docker volumes. To troubleshoot this issue, first check the volume’s configuration and ensure that it’s correctly mounted to the container. If the issue persists, try using a different type of volume or consider using a database container that handles data persistence for you.
Debugging Docker Containers and Images
To debug Docker containers and images on Ubuntu, you can use several tools, including the “docker inspect” command, which provides detailed information about a container or image. You can also use the “docker exec” command to run a shell command inside a running container, which can be useful for debugging and troubleshooting.
By understanding these common issues and solutions, you can effectively troubleshoot and debug Docker on Ubuntu. Remember to always ensure that your Docker containers and images are correctly configured and up-to-date to avoid issues.


