Understanding the CI/CD Pipeline Concept
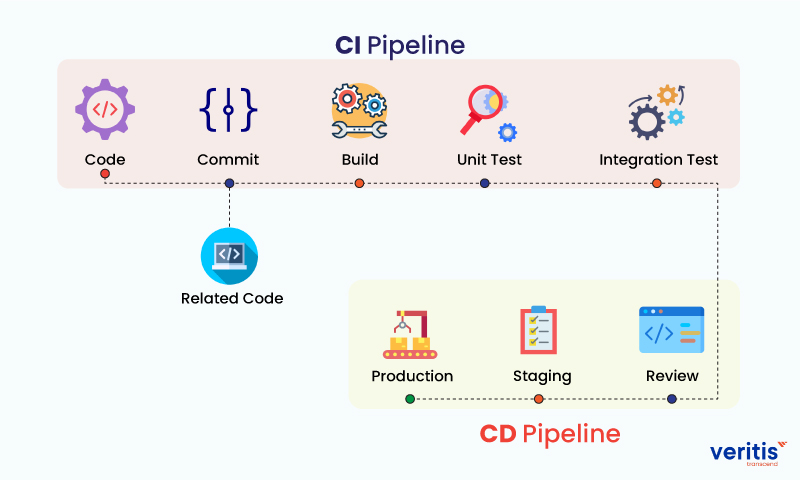
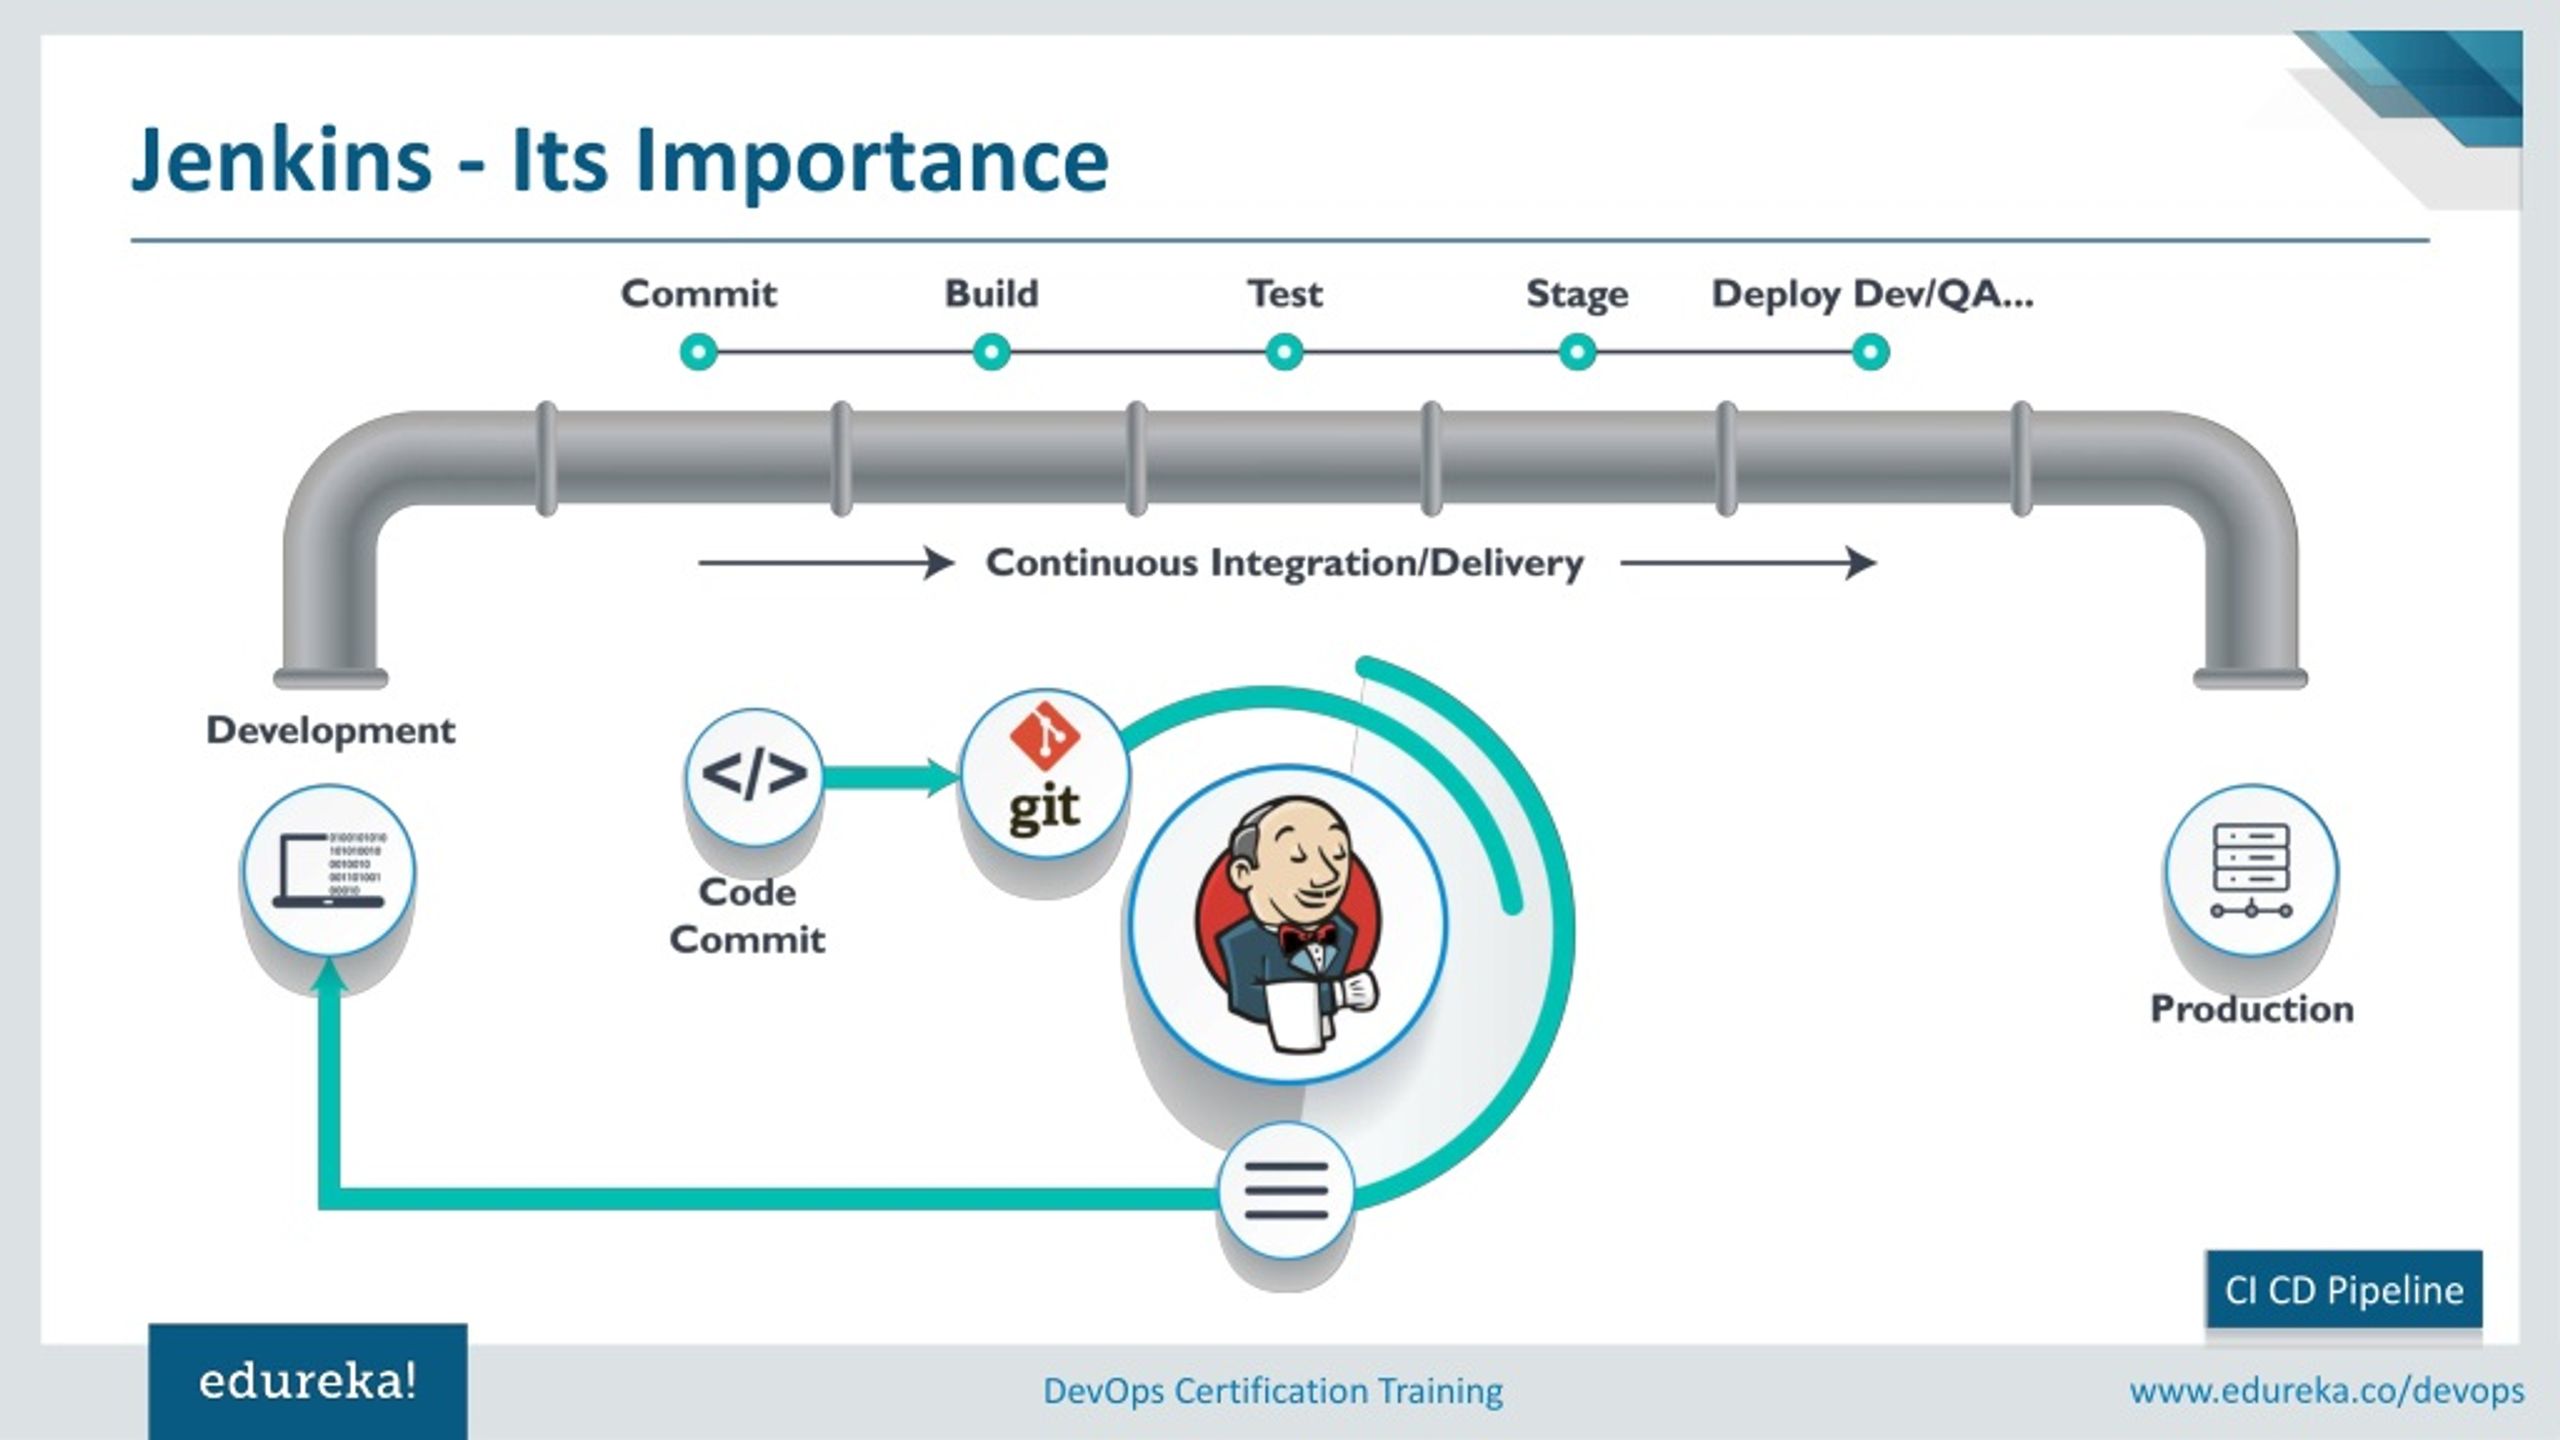
A Continuous Integration and Continuous Delivery (CI/CD) pipeline is a method to frequently and reliably deliver applications to production. It is an essential part of modern software development, enabling teams to implement changes and fix bugs quickly while maintaining high software quality. The CI/CD pipeline consists of several stages, including building, testing, and deploying, that work together to automate the software delivery process.
In this ci/cd pipeline tutorial, we will discuss the various aspects of setting up a CI/CD pipeline, from selecting the right tools to monitoring and maintaining your pipeline. By the end of this tutorial, you will have a solid understanding of how to implement a CI/CD pipeline for your software project, ensuring faster development cycles, higher quality, and more efficient collaboration among team members.
Selecting the Right CI/CD Tools for Your Project
Choosing the right CI/CD tool for your project is crucial for ensuring a smooth development process and successful deployment. Various CI/CD tools are available, each with its unique features, advantages, and disadvantages. Popular options include Jenkins, GitLab CI/CD, CircleCI, and Travis CI.
Jenkins is a highly customizable, open-source CI/CD tool with a vast plugin ecosystem. It supports a wide range of programming languages and platforms, making it a versatile choice for many projects. However, its user interface can be overwhelming for beginners, and setting it up might require more time and effort compared to other tools.
GitLab CI/CD is a built-in CI/CD solution for GitLab repositories, offering seamless integration with version control. It is an excellent option for teams already using GitLab, as it eliminates the need for external tools and simplifies the CI/CD setup process. GitLab CI/CD is also known for its user-friendly interface and comprehensive documentation.
CircleCI is a cloud-based CI/CD tool that supports various languages and frameworks. It offers a simple setup process, easy-to-use interface, and powerful features like parallelism and caching. CircleCI’s cloud infrastructure allows for easy scaling and reduces the need for managing servers. However, it can be more expensive than self-hosted solutions for larger teams or projects.
Travis CI is another cloud-based CI/CD tool, primarily designed for open-source projects but also offering paid plans for private repositories. It integrates well with GitHub and Bitbucket, providing automatic build and test execution upon code commits. Travis CI’s simplicity and ease of use make it an attractive choice for small teams and open-source projects, but it may lack some advanced features found in other tools.
When selecting a CI/CD tool, consider factors such as ease of use, integration with your existing tools and platforms, cost, and scalability. By carefully evaluating your project’s requirements and the available options, you can choose a CI/CD tool that streamlines your development process and supports your team’s workflow.
Getting Started: Configuring Your CI/CD Tool
Once you have selected a CI/CD tool based on your project’s requirements, it’s time to configure it for your specific use case. Here, we will provide a step-by-step guide on how to configure your chosen CI/CD tool, using Jenkins as an example.
Step 1: Install Jenkins
Download and install Jenkins on a server or a local machine. For this tutorial, we will use the official Jenkins installation package.
Step 2: Create a New Job
After installation, navigate to the Jenkins dashboard and click on “New Item.” Choose a “Freestyle project” and enter a name for your job.
Step 3: Configure Source Code Management
Under the “Source Code Management” section, select “Git” and enter your repository URL. Optionally, you can specify branches to build and credentials for accessing the repository.
Step 4: Set Up Build Triggers
In the “Build Triggers” section, enable “GitHub hook trigger for GITScm polling” to automatically trigger builds when changes are pushed to your repository. If you are not using GitHub, choose the appropriate hook trigger for your VCS.
Step 5: Configure Build Steps
Under the “Build” section, add build steps such as “Execute Shell” or “Execute Windows Batch Command” to run scripts or commands during the build process. For example, you can include a command to install dependencies, compile code, or run tests.
Step 6: Save and Build
Save your job configuration and click “Build Now” to start a manual build. You can monitor the build progress and view build logs to troubleshoot any issues.
By following these steps, you can configure your chosen CI/CD tool and start automating your software delivery process. Remember to adapt these steps to your specific CI/CD tool and project requirements.
Version Control Integration: Connecting Your Repository
Integrating your CI/CD tool with your version control system (VCS) is crucial for automating your software delivery process. By connecting your repository, you can ensure that every code change triggers a build, test, and deployment process, enabling faster feedback and quicker issue resolution.
In this section, we will discuss how to integrate your CI/CD tool with Git, a popular VCS, using GitLab CI/CD as an example. However, the integration process is similar for other CI/CD tools and VCSs.
Step 1: Create a .gitlab-ci.yml File
In the root directory of your project, create a file named .gitlab-ci.yml. This file will define your CI/CD pipeline configuration, including build stages, jobs, and dependencies.
Step 2: Define Stages
In the .gitlab-ci.yml file, define the stages of your pipeline. For example:
.gitlab-ci.yml: stages: - build - test - deployStep 3: Create Jobs
Under each stage, create jobs that define specific tasks. For instance:
.gitlab-ci.yml: stages: - build build_job: stage: build script: echo "Building the application" - test test_job: stage: test script: echo "Running tests" - deploy deploy_job: stage: deploy script: echo "Deploying to production"Step 4: Connect Your Repository
Push the .gitlab-ci.yml file to your GitLab repository. GitLab CI/CD will automatically detect the configuration file and start running the defined pipeline whenever changes are pushed to the repository.
By integrating your VCS with your CI/CD tool, you can ensure that your pipeline runs automatically, providing faster feedback and enabling a more efficient development process.
Automated Testing: Ensuring Quality and Reliability
Automated testing is an integral part of a CI/CD pipeline, enabling developers to maintain high software quality and reliability. By automating tests, you can ensure that every code change is thoroughly tested, reducing the risk of introducing bugs and regressions. In this section, we will discuss how to configure your pipeline to run unit tests, integration tests, and functional tests automatically.
Unit Tests
Unit tests are designed to test individual components or functions of your application. To run unit tests automatically in your pipeline, add a test stage and specify the commands to execute your tests. For example, in a Node.js application using Mocha as a testing framework, you can add the following to your .gitlab-ci.yml file:
.gitlab-ci.yml: stages: - test test_job: stage: test script: - npm install - npm testIntegration Tests
Integration tests verify that different components of your application work together correctly. To run integration tests, create a separate job in your pipeline and specify the commands to execute the tests. For instance:
.gitlab-ci.yml: stages: - test integration_test_job: stage: test script: - npm install - npm run integration-testFunctional Tests
Functional tests validate your application’s functionality from the user’s perspective. To run functional tests, create another job in your pipeline and specify the commands to execute the tests. For example:
.gitlab-ci.yml: stages: - test functional_test_job: stage: test script: - npm install - npm run functional-testBy automating your tests in a CI/CD pipeline, you can ensure that your application maintains high quality and reliability, making it easier to deliver software updates quickly and efficiently.
Continuous Integration: Merging Code Changes
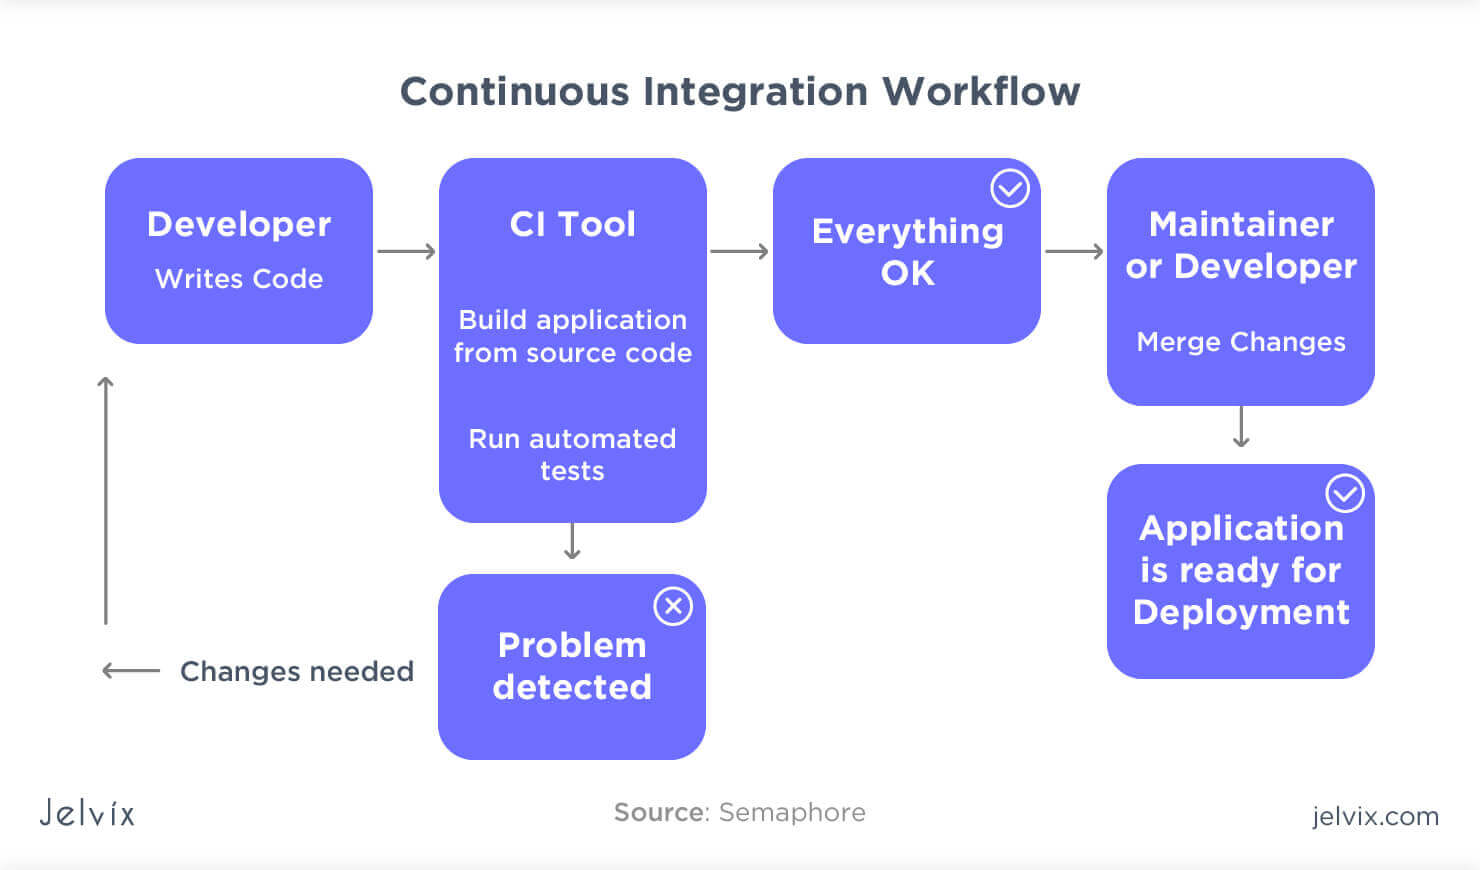
Continuous Integration (CI) is a software development practice where developers frequently merge their code changes into a shared repository, enabling early detection and resolution of integration issues. By integrating code changes frequently, teams can avoid the challenges associated with merging large, conflicting codebases. In this section, we will discuss the concept of continuous integration and best practices for merging code and resolving merge conflicts.
The Importance of Continuous Integration
Continuous Integration helps developers maintain a stable and reliable codebase by ensuring that code changes are tested and integrated frequently. By merging code changes early and often, teams can:
- Detect and resolve conflicts quickly
- Ensure that the application remains functional and stable
- Reduce the risk of introducing bugs and regressions
- Accelerate the development process
Best Practices for Merging Code
To make the most of continuous integration, follow these best practices:
- Commit code frequently: Small, frequent commits are easier to review, test, and merge.
- Keep branches up-to-date: Regularly update your branches with the latest changes from the main branch to minimize merge conflicts.
- Resolve merge conflicts promptly: Address merge conflicts as soon as they arise to prevent them from becoming more complex and time-consuming to resolve.
- Automate testing: Test code changes automatically as part of the CI process to ensure that new code does not introduce bugs or regressions.
By following these best practices, teams can maintain a stable and reliable codebase, reduce the risk of introducing bugs and regressions, and accelerate the development process.
Continuous Delivery: Deploying to Production
Continuous Delivery (CD) is the practice of automating the software delivery process, enabling teams to release software updates quickly, reliably, and frequently. By automating the deployment process, teams can reduce the risk of introducing errors and accelerate the release cycle. In this section, we will discuss how to set up continuous delivery to production and best practices for automating the deployment process.
The Benefits of Continuous Delivery
Continuous Delivery offers several benefits, including:
- Faster release cycles: By automating the deployment process, teams can release software updates more frequently, accelerating the development process.
- Reduced risk: Automated deployments reduce the risk of introducing errors and enable teams to roll back to previous versions if necessary.
- Improved collaboration: Continuous Delivery encourages collaboration between development and operations teams, fostering a DevOps culture.
Setting Up Continuous Delivery
To set up continuous delivery, follow these steps:
- Configure your CI/CD tool to build and test your application automatically.
- Create a deployment pipeline that automates the deployment process, including building, testing, and deploying your application to a staging environment.
- Configure your pipeline to deploy your application to production automatically when changes pass through the staging environment.
- Implement a rollback strategy that enables you to revert to previous versions if necessary.
By automating the deployment process, teams can release software updates quickly, reliably, and frequently, improving collaboration and reducing the risk of introducing errors.
Monitoring and Maintenance: Keeping Your Pipeline Healthy
Monitoring and maintaining your CI/CD pipeline is essential for ensuring smooth pipeline operation and identifying issues before they impact your development process. By implementing monitoring tools and best practices, teams can proactively troubleshoot issues, improve pipeline performance, and maintain a high level of quality and reliability. In this section, we will discuss various monitoring tools and best practices for maintaining your CI/CD pipeline.
Monitoring Tools
There are several monitoring tools available for CI/CD pipelines, including:
- Log analysis tools: Tools like ELK Stack (Elasticsearch, Logstash, and Kibana) and Graylog enable teams to collect, analyze, and visualize log data from their CI/CD pipelines.
- Performance monitoring tools: Tools like Prometheus and Grafana enable teams to monitor pipeline performance, identify bottlenecks, and optimize pipeline efficiency.
- Alerting tools: Tools like Nagios and PagerDuty enable teams to set up alerts and notifications for pipeline issues, ensuring that teams are aware of issues as soon as they occur.
Best Practices for Maintenance
To maintain your CI/CD pipeline, follow these best practices:
- Regularly review pipeline performance and identify areas for improvement.
- Implement a regular maintenance schedule, including tasks like cleaning up old builds and testing environments.
- Monitor pipeline logs and metrics to identify issues and optimize pipeline performance.
- Implement a disaster recovery plan to ensure that your pipeline can be quickly restored in the event of a failure.
By implementing monitoring tools and best practices, teams can maintain a healthy and reliable CI/CD pipeline, ensuring that software updates are delivered quickly, reliably, and efficiently.


