Getting Familiar with Azure Blob Storage
Azure Blob Storage is a Microsoft Azure offering that specializes in storing large amounts of unstructured data, such as text and binary data. As a part of Azure Storage, Blob Storage is designed to scale and manage data efficiently in the cloud. This azure blob storage tutorial will walk you through the process of understanding, utilizing, and mastering Azure Blob Storage.
Azure Blob Storage is an ideal solution for various use cases, including: storing files for distributed access, big data analytics, backups, archiving, and disaster recovery. Its high scalability, availability, and resiliency make it a popular choice for developers and businesses looking to leverage cloud storage.
In this tutorial, you will learn about the main features of Azure Blob Storage, the different account tiers, and how to create an Azure Blob Storage account. Furthermore, you will gain hands-on experience with containers, blobs, and essential management tasks. By the end of this tutorial, you will have a solid understanding of Azure Blob Storage and its practical applications.
https://www.youtube.com/watch?v=S5nqaQRHXrE
Creating an Azure Blob Storage Account
To get started with Azure Blob Storage, you’ll first need to create an Azure Blob Storage account. This process is straightforward and can be completed in a few simple steps through the Azure portal. Here’s a step-by-step guide:
- Log in to the Azure portal with your Azure account.
- Click on the “Create a resource” button (usually located at the top left corner) and search for “Storage account”.
- Select “Storage account” from the search results and click “Create”.
- Fill in the required details, such as subscription, resource group, storage account name, location, and account tier.
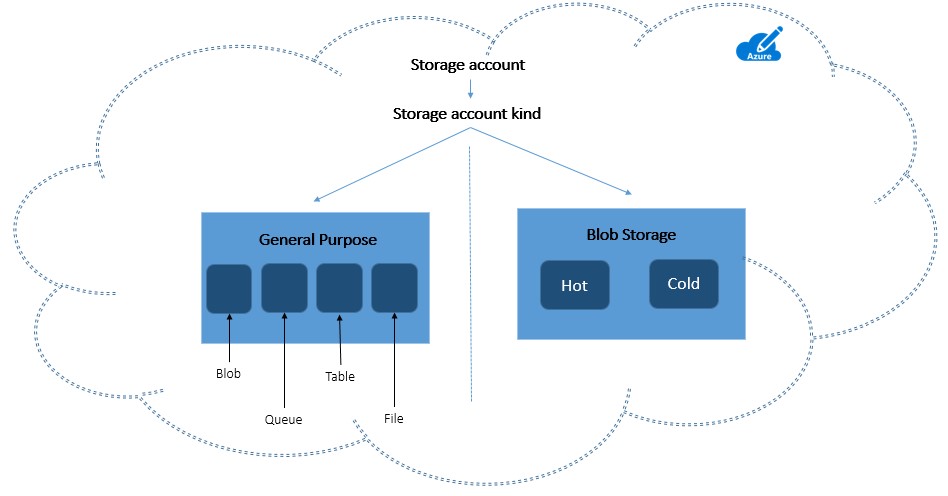
- Choose the appropriate account tier based on your requirements and budget. The different tiers (Hot, Cool, and Archive) have varying implications on cost and performance.
- Click “Review + Create” to review your settings and create the storage account.
- Once the deployment is complete, navigate to the newly created storage account.
Now that you have created an Azure Blob Storage account, you can start utilizing its features and functionalities. In the following sections of this azure blob storage tutorial, you will learn about containers, blobs, and how to manage them effectively.

Understanding Containers and Blobs
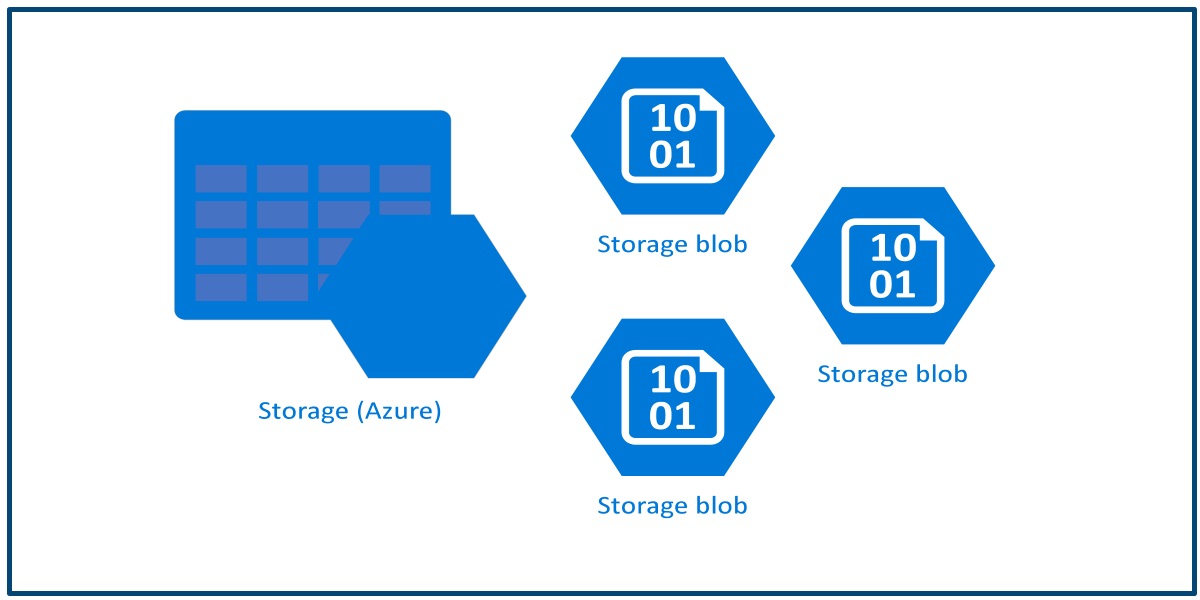
Azure Blob Storage is built around two core concepts: containers and blobs. A container is a logical unit that holds a collection of blobs. Blobs, on the other hand, are binary large objects that store unstructured data, such as text and binary data. Containers provide a way to organize and manage blobs, making it easier to handle large amounts of data in Azure Blob Storage.
There are three types of blobs in Azure Blob Storage:
- Block blobs: Ideal for storing text and binary data, block blobs are made up of blocks of data that can be managed individually. They can store up to 4.75 TiB of data and are suitable for applications that require large objects, such as multimedia files, documents, and backups.
- Append blobs: Designed for append operations, append blobs are similar to block blobs but optimized for append-only writes. They can store up to 4.75 TiB of data and are commonly used for logging, auditing, and telemetry data.
- Page blobs: Optimized for random writes, page blobs store data in 512-byte pages. They can store up to 8 TiB of data and are primarily used for storing virtual machine disks in Azure.
In this section of the azure blob storage tutorial, you have learned about the fundamental concepts of containers and blobs, as well as their different types. In the following sections, you will learn how to upload, download, and manage blobs using tools like Azure Storage Explorer and Azure CLI.
How to Upload, Download, and Manage Blobs
In this section of the azure blob storage tutorial, you will learn how to perform basic operations with blobs, such as uploading, downloading, listing, and deleting. We will use the Azure Storage Explorer and Azure CLI as the primary tools for demonstration.
Using Azure Storage Explorer
Azure Storage Explorer is a free, standalone app from Microsoft that allows you to easily create, manage, and delete storage accounts, containers, and blobs. Follow these steps to upload, download, and manage blobs using Azure Storage Explorer:
- Download and install the Azure Storage Explorer.
- Connect to your Azure subscription and navigate to your storage account.
- Create a new container or select an existing one.
- To upload a blob, click “Upload” and choose the file(s) you want to upload.
- To download a blob, right-click on the blob and select “Download”.
- To manage blobs, use the context menu to delete, copy, or rename blobs.
Using Azure CLI
Azure CLI is a cross-platform command-line tool for managing Azure resources. Follow these steps to upload, download, and manage blobs using Azure CLI:
- Install the Azure CLI.
- Connect to your Azure subscription using the “az login” command.
- Create a new container or select an existing one using the “az storage container create” and “az storage container show” commands.
- Upload a blob using the “az storage blob upload” command.
- Download a blob using the “az storage blob download” command.
- List, delete, copy, or rename blobs using the appropriate “az storage blob” commands.
By mastering these basic operations, you can effectively manage your blobs in Azure Blob Storage. In the next sections of this azure blob storage tutorial, you will learn about access control, security, performance optimization, monitoring, and integration with other Azure services.
Implementing Access Control and Security
In this section of the azure blob storage tutorial, you will learn about the security measures available in Azure Blob Storage, such as shared access signatures, role-based access control, and encryption. These features help ensure data protection and secure access to your blobs.
Shared Access Signatures (SAS)
A shared access signature (SAS) is a token-based mechanism that grants secure, direct access to specific Azure Storage resources, such as blobs and containers. By creating a SAS, you can delegate access to your storage accounts without sharing your account keys. SAS can be configured with specific permissions (read, write, delete, etc.) and expiration times, making it a flexible and secure option for sharing data.
Role-Based Access Control (RBAC)
Role-Based Access Control (RBAC) is a method of controlling access to Azure resources based on roles assigned to users, groups, and services. RBAC allows you to manage who has access to your Azure Blob Storage accounts and what permissions they have. By using RBAC, you can ensure that only authorized users can perform specific actions on your blobs and containers.
Encryption
Azure Blob Storage supports various encryption options to protect your data, including:
- Service-managed keys: Azure Storage automatically manages encryption and decryption for your data using Microsoft-managed keys.
- Customer-managed keys: You can manage and control the encryption keys using Azure Key Vault, allowing you to meet specific compliance requirements.
- Double encryption: Azure Storage provides an additional layer of security by encrypting your data twice, using both service-managed and customer-managed keys.
By implementing these security measures, you can ensure that your Azure Blob Storage data is protected and secure. In the next sections of this azure blob storage tutorial, you will learn about optimizing performance, monitoring, and integrating Azure Blob Storage with other Azure services.

Optimizing Performance and Scalability
In this section of the azure blob storage tutorial, you will learn about best practices for optimizing performance and scalability in Azure Blob Storage. By implementing these strategies, you can ensure that your applications can handle high traffic and large data volumes efficiently.
Load Balancing
Azure Blob Storage provides built-in load balancing capabilities to distribute traffic evenly across multiple storage nodes. This ensures that your data is accessible with minimal latency and high availability. By default, Azure Blob Storage automatically load balances your data, but you can also manually configure load balancing settings to fine-tune performance.
Partitioning
Partitioning is a technique for dividing large data sets into smaller, more manageable chunks. By partitioning your data in Azure Blob Storage, you can improve query performance, reduce latency, and scale more efficiently. Azure Blob Storage supports various partitioning strategies, such as using a consistent hashing algorithm or dividing data based on time or location.
Parallel Uploads and Downloads
Parallel uploads and downloads allow you to transfer multiple blobs simultaneously, significantly improving data transfer performance. By using parallel transfers, you can reduce the time it takes to upload or download large data sets, making it easier to manage your data in Azure Blob Storage.
Concurrency and Throttling
Azure Blob Storage supports concurrent requests, allowing multiple clients to access and modify data simultaneously. However, excessive concurrency can lead to performance issues or throttling. To avoid these issues, monitor your storage account’s performance and adjust concurrency settings as needed. You can also use Azure Blob Storage’s throttling features to limit the number of concurrent requests and prevent performance degradation.
By following these best practices, you can optimize the performance and scalability of your Azure Blob Storage solutions. In the next sections of this azure blob storage tutorial, you will learn about monitoring and troubleshooting Azure Blob Storage, as well as integrating it with other Azure services.
Monitoring and Troubleshooting Azure Blob Storage
In this section of the azure blob storage tutorial, you will learn how to monitor and troubleshoot Azure Blob Storage using Azure Monitor, Azure Log Analytics, and other built-in tools. By effectively monitoring your Azure Blob Storage, you can quickly identify and resolve issues, ensuring optimal performance and data availability.
Azure Monitor
Azure Monitor is a centralized monitoring solution that collects, analyzes, and acts on telemetry from Azure resources, including Azure Blob Storage. With Azure Monitor, you can:
- Monitor performance metrics, such as transaction count, throughput, and latency.
- Create custom alerts and notifications based on specific conditions or thresholds.
- Analyze log data to diagnose and troubleshoot issues.
- Integrate with other Azure services, like Azure Log Analytics, for advanced analytics and visualization.
Azure Log Analytics
Azure Log Analytics is a powerful tool for analyzing and visualizing log data from various sources, including Azure Blob Storage. By using Azure Log Analytics, you can:
- Query and analyze log data to identify trends, patterns, and anomalies.
- Create custom dashboards and visualizations to monitor key performance indicators (KPIs).
- Correlate log data from multiple sources to gain a holistic view of your Azure Blob Storage environment.
- Integrate with Azure Monitor to create custom alerts and notifications based on log data.
Common Issues and Solutions
Some common issues you may encounter when working with Azure Blob Storage include:
- Throttling: If you exceed the request rate limit for your storage account, you may experience throttling. To resolve this issue, consider implementing strategies like load balancing, partitioning, and parallel uploads/downloads.
- Data inconsistency: Inconsistencies in data can occur due to concurrent updates or network issues. To ensure data consistency, consider using Azure Blob Storage’s lease feature or implementing optimistic concurrency control.
- Authentication and authorization errors: Ensure that you have properly configured access control and security settings, such as shared access signatures, role-based access control, and encryption.
By effectively monitoring and troubleshooting Azure Blob Storage, you can maintain optimal performance, data availability, and security. In the final section of this azure blob storage tutorial, you will learn about integrating Azure Blob Storage with other Azure services, such as Azure Functions, Azure Data Factory, and Azure Event Grid.

Integrating Azure Blob Storage with Other Azure Services
In this final section of the azure blob storage tutorial, you will learn how Azure Blob Storage can be integrated with other Azure services, such as Azure Functions, Azure Data Factory, and Azure Event Grid. By integrating Azure Blob Storage with these services, you can create powerful, scalable, and efficient solutions for various use cases.
Azure Functions
Azure Functions is a serverless compute service that enables you to run code on-demand, without managing infrastructure. By integrating Azure Blob Storage with Azure Functions, you can create event-driven workflows that automatically process and respond to changes in your data. For example, you can create a function that automatically resizes and optimizes images stored in Azure Blob Storage when they are uploaded or modified.
Azure Data Factory
Azure Data Factory is a cloud-based data integration service that allows you to create, schedule, and manage data workflows. By integrating Azure Blob Storage with Azure Data Factory, you can easily ingest, process, and analyze large volumes of data from various sources. For instance, you can create a pipeline that moves data from Azure Blob Storage to Azure Synapse Analytics (formerly SQL Data Warehouse) for further analysis and reporting.
Azure Event Grid
Azure Event Grid is a fully managed event routing service that enables you to easily create event-based architectures. By integrating Azure Blob Storage with Azure Event Grid, you can create reactive and scalable applications that automatically respond to changes in your data. For example, you can create a subscription that triggers an event when a new blob is uploaded to a container, allowing you to process and analyze the data in real-time.
By integrating Azure Blob Storage with other Azure services, you can create powerful, flexible, and scalable solutions for a wide range of use cases. The following real-world examples demonstrate the versatility and potential of Azure Blob Storage:
- Media and entertainment: Store, manage, and distribute large media files, such as videos and images, using Azure Blob Storage and Azure Media Services.
- Internet of Things (IoT): Collect, process, and analyze telemetry data from IoT devices using Azure Blob Storage and Azure IoT Hub.
- Backups and archiving: Back up and archive on-premises data using Azure Blob Storage and Azure Backup or Azure Archive Storage.
With its robust features, flexible integration options, and extensive ecosystem, Azure Blob Storage is an ideal choice for storing and managing unstructured data in the cloud. By mastering Azure Blob Storage, you can unlock the full potential of cloud storage and build innovative, efficient, and scalable solutions for your organization or clients.