An Overview of Lens Kubernetes and Its Benefits
Lens Kubernetes is a powerful and user-friendly Integrated Development Environment (IDE) designed specifically for Windows users who work with Kubernetes. This open-source software offers a wide range of features and advantages that simplify Kubernetes management and enhance productivity. Some of its main benefits include:
- A visually appealing and intuitive user interface that makes it easy to navigate and manage Kubernetes resources.
- Time-saving shortcuts and hotkeys that streamline workflows and reduce the need for manual input.
- Extensive documentation and community support, ensuring that users can quickly find help and answers to their questions.
- Real-time monitoring and visualization of Kubernetes clusters, enabling users to identify and resolve issues promptly.
- Seamless integration with popular Kubernetes tools and platforms, such as Helm, Kustomize, and Kind.
With Lens Kubernetes for Windows, users can manage their Kubernetes clusters more efficiently and effectively, reducing the learning curve and minimizing the risk of errors. The software’s powerful capabilities and user-friendly design make it an ideal choice for both beginners and experienced Kubernetes users alike.

Why Download Lens Kubernetes for Windows?
Lens Kubernetes for Windows is an excellent choice for users looking to simplify their Kubernetes management and improve productivity. By downloading and using this powerful IDE, users can benefit from:
- Ease of use: Lens Kubernetes for Windows offers an intuitive user interface that makes it easy for users to manage their Kubernetes clusters, regardless of their experience level.
- Powerful capabilities: The software provides a wide range of features and functionalities that streamline Kubernetes workflows and reduce the risk of errors.
- Community support: Lens Kubernetes for Windows has a large and active community of users and developers who can provide help and support when needed.
- Integration with popular tools: Lens Kubernetes for Windows integrates seamlessly with popular Kubernetes tools and platforms, such as Helm, Kustomize, and Kind, making it a versatile and flexible solution for managing Kubernetes clusters.
- Real-time monitoring and visualization: Lens Kubernetes for Windows offers real-time monitoring and visualization of Kubernetes clusters, enabling users to identify and resolve issues promptly.
By downloading Lens Kubernetes for Windows, users can take advantage of these benefits and streamline their Kubernetes workflows, leading to improved productivity and better outcomes. The software’s ease of use, powerful capabilities, and community support make it an ideal choice for Windows users who want to simplify their Kubernetes management and focus on delivering value to their organizations.

How to Download Lens Kubernetes for Windows
Downloading Lens Kubernetes for Windows is a straightforward process that can be completed in a few simple steps. Here’s a step-by-step guide to help you get started:
- Visit the official Lens Kubernetes website at https://k8slens.dev/.
- Click on the “Download” button in the top right corner of the page.
- Select the Windows operating system from the list of available options.
- Choose the appropriate version for your system (x64 or ARM64).
- Once the download is complete, locate the installer file in your system’s “Downloads” folder.
- Double-click on the installer file to launch the installation process.
- Follow the on-screen instructions to complete the installation.
- Once the installation is complete, launch Lens Kubernetes from your system’s application menu.
- You may be prompted to sign in or create a new account. Follow the prompts to complete the setup process.
Before downloading Lens Kubernetes for Windows, make sure your system meets the necessary system requirements. Lens Kubernetes requires Windows 10 or later, with at least 4 GB of RAM and 2 GB of available disk space. It’s also recommended to have the latest version of the .NET Framework installed on your system.
Installing and Configuring Lens Kubernetes for Windows
After downloading Lens Kubernetes for Windows, the next step is to install and configure the software for optimal performance and security. Here’s a step-by-step guide to help you get started:
- Launch the Lens Kubernetes installer by double-clicking on the downloaded file.
- Follow the on-screen instructions to complete the installation process. This typically involves accepting the license agreement, selecting the installation location, and choosing whether to create a desktop shortcut.
- Once the installation is complete, launch Lens Kubernetes from your system’s application menu.
- You may be prompted to sign in or create a new account. Follow the prompts to complete the setup process.
- To configure Lens Kubernetes for optimal performance, consider the following tips:
- Enable automatic updates to ensure you’re always running the latest version of the software.
- Configure your Kubernetes context to connect to the appropriate cluster.
- Customize your dashboard to display the metrics and resources that are most important to you.
- Explore the available plugins and extensions to enhance your Lens Kubernetes experience.
- To ensure security, consider the following best practices:
- Use a strong, unique password for your Lens Kubernetes account.
- Enable two-factor authentication for added protection.
- Limit the number of users with administrative access to your Lens Kubernetes installation.
- Regularly review your Kubernetes cluster logs for signs of suspicious activity.
Common issues that users may encounter during the installation and configuration process include compatibility issues with older versions of Windows or the .NET Framework, and difficulty connecting to Kubernetes clusters. If you encounter any issues, consult the official Lens Kubernetes documentation or seek help from the community forums.
Using Lens Kubernetes for Windows: A Hands-On Approach
Now that you’ve installed and configured Lens Kubernetes for Windows, it’s time to start using it to manage your Kubernetes clusters. Here are some practical examples and use cases to help you get the most out of the software:
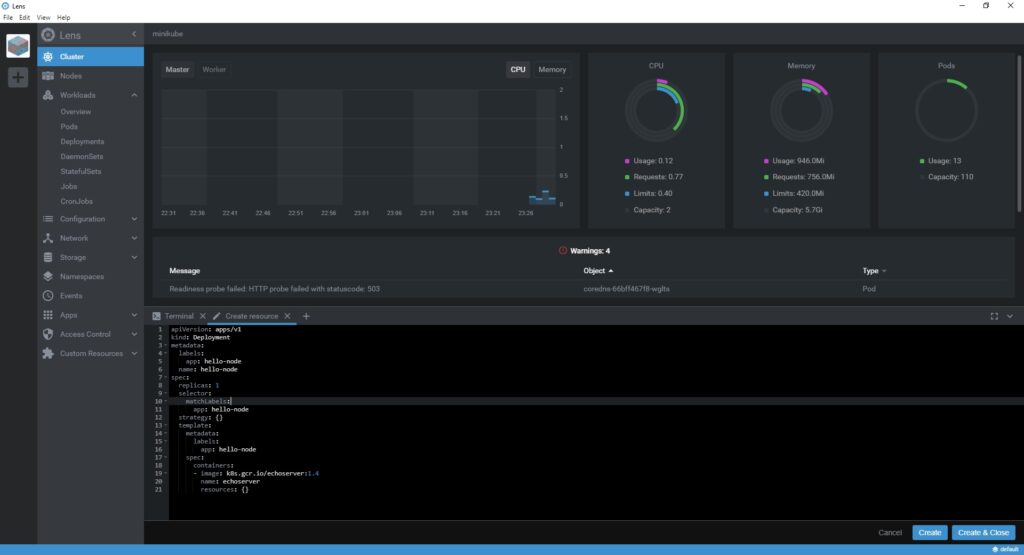
Deploying Applications
With Lens Kubernetes for Windows, you can easily deploy applications to your Kubernetes clusters. Here’s how:
- Select the cluster you want to deploy to from the Lens Kubernetes dashboard.
- Click on the “Create” button in the top right corner of the screen.
- Select “Deployment” from the dropdown menu.
- Fill in the required fields, such as the application name, image, and replicas.
- Click “Create” to deploy the application to your cluster.
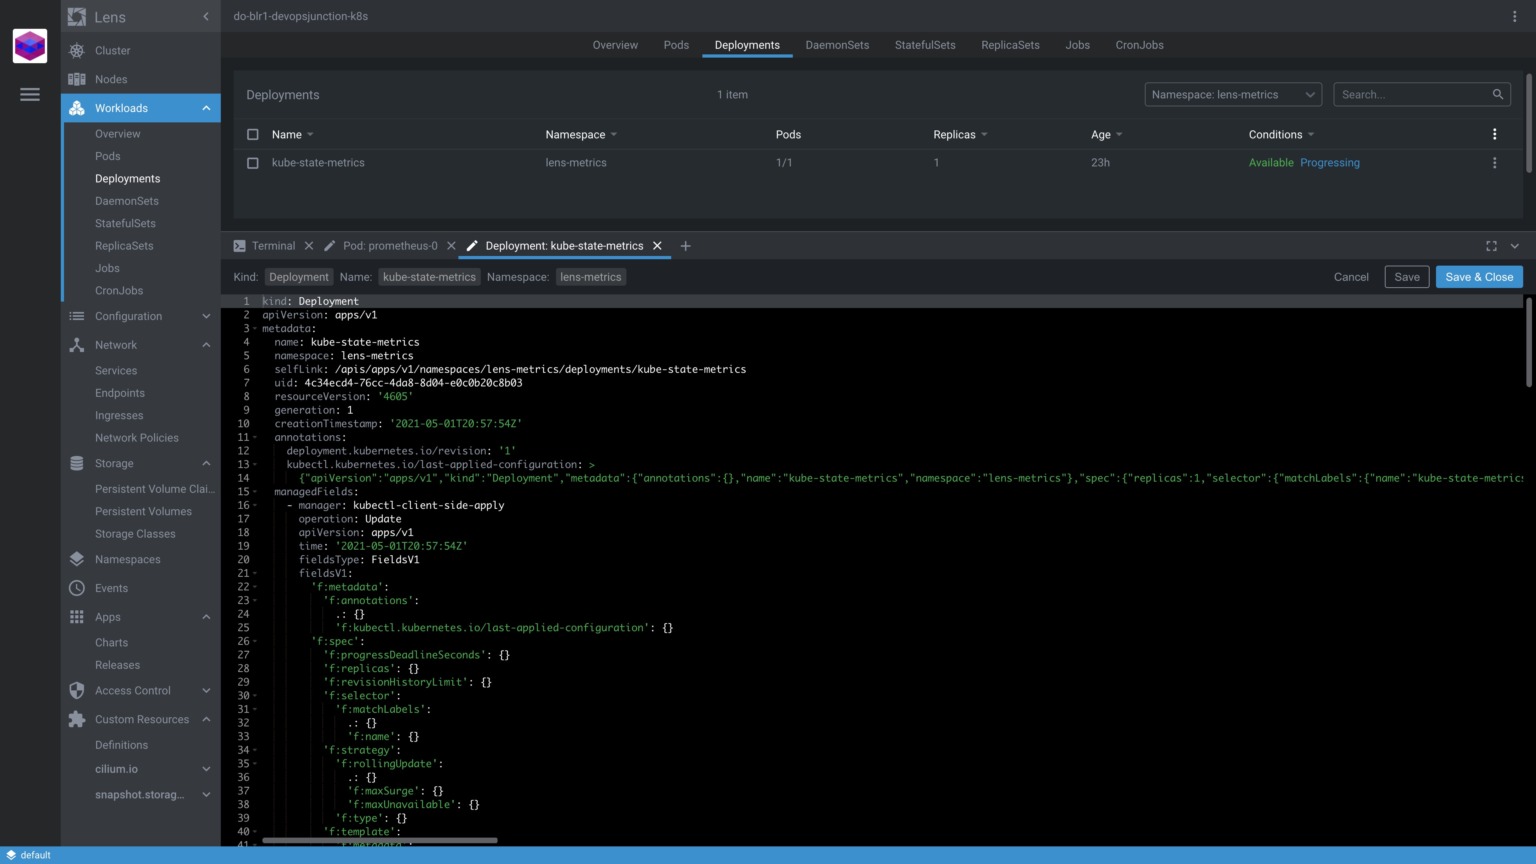
Monitoring Resources
Lens Kubernetes for Windows provides real-time monitoring of your Kubernetes resources. Here’s how to use it:
- Select the cluster you want to monitor from the Lens Kubernetes dashboard.
- Click on the “Resources” tab in the left-hand menu.
- Use the dropdown menus to filter the resources by type, namespace, and label.
- View the resource usage metrics, such as CPU, memory, and network traffic, in real-time.
Troubleshooting Issues
Lens Kubernetes for Windows can also help you troubleshoot issues with your Kubernetes clusters. Here’s how:
- Select the cluster with the issue from the Lens Kubernetes dashboard.
- Click on the “Logs” tab in the left-hand menu.
- Use the dropdown menus to filter the logs by pod, container, and label.
- View the logs in real-time to identify any issues or errors.
By using Lens Kubernetes for Windows to deploy applications, monitor resources, and troubleshoot issues, you can streamline your Kubernetes workflows and improve your productivity. Use clear, concise language and visual aids, such as screenshots and diagrams, to enhance understanding and help users quickly grasp the concepts.

Comparing Lens Kubernetes for Windows with Other Kubernetes IDEs
When it comes to managing Kubernetes clusters on Windows, there are several IDEs available. However, Lens Kubernetes stands out as a popular choice due to its ease of use, powerful capabilities, and community support. Here’s a comparison of Lens Kubernetes for Windows with other Kubernetes IDEs available for Windows:
Visual Studio Code with the Kubernetes extension
Visual Studio Code is a popular code editor for Windows users. With the Kubernetes extension, users can manage their Kubernetes clusters directly from the code editor. However, the user interface is not as user-friendly as Lens Kubernetes, and users may find it difficult to navigate and perform common tasks.
K9s
K9s is a terminal-based UI for Kubernetes that allows users to manage their clusters from the command line. While it is a powerful tool, it may not be as accessible to users who are not familiar with the command line interface. Additionally, it lacks some of the visual aids and shortcuts that Lens Kubernetes offers.
Octant
Octant is a web-based, highly extensible platform for developers to understand and manage their Kubernetes applications. It provides a user-friendly interface and real-time visibility into Kubernetes clusters. However, it may not be as feature-rich as Lens Kubernetes, and users may find that some tasks require more manual intervention.
Comparing Strengths and Weaknesses
When comparing Lens Kubernetes for Windows with other Kubernetes IDEs, it’s important to consider the following factors:
- Ease of use: Lens Kubernetes for Windows offers a user-friendly interface that is easy to navigate, even for users who are new to Kubernetes.
- Features: Lens Kubernetes for Windows offers a wide range of features, including real-time monitoring, visual aids, and time-saving shortcuts.
- Community support: Lens Kubernetes for Windows has a large and active community of users and developers who can provide help and support.
By evaluating these factors, users can make an informed decision about which Kubernetes IDE is right for their needs. While there are other Kubernetes IDEs available for Windows, Lens Kubernetes stands out as a top choice due to its ease of use, powerful capabilities, and community support.
Staying Updated with Lens Kubernetes for Windows
Staying updated with Lens Kubernetes for Windows is essential to ensure optimal performance, security, and access to new features. Here’s how to check for updates, subscribe to release notifications, and participate in the development community:
Checking for Updates
Lens Kubernetes for Windows automatically checks for updates when launched. However, users can manually check for updates by clicking on the “Check for updates” button in the settings menu. It is recommended to install updates as soon as they become available to ensure optimal performance and security.
Subscribing to Release Notifications
Users can subscribe to release notifications by following the Lens Kubernetes for Windows GitHub repository. By doing so, they will receive notifications when new releases are available, as well as access to release notes, known issues, and other relevant information.
Participating in the Development Community
Lens Kubernetes for Windows has a large and active development community. Users can participate in the community by reporting bugs, requesting features, and contributing to the project. By doing so, they can help improve the software and ensure that it meets the needs of the Kubernetes community.
Benefits of Staying Current
Staying current with Lens Kubernetes for Windows has several benefits, including:
- Improved performance: New releases often include performance improvements and bug fixes that can enhance the user experience.
- Increased security: Staying current with security patches and updates can help protect against potential vulnerabilities and threats.
- Access to new features: New releases may include new features and functionalities that can improve productivity and streamline workflows.
By staying updated with Lens Kubernetes for Windows, users can ensure that they are using the best possible tool for managing their Kubernetes clusters on Windows.

Getting Help and Support for Lens Kubernetes for Windows
Even with the most user-friendly interface and powerful capabilities, users may still encounter issues or have questions when using Lens Kubernetes for Windows. Fortunately, there are several resources available for help and support:
Official Documentation
The Lens Kubernetes for Windows documentation is a comprehensive resource that covers all aspects of the software, from installation and configuration to common tasks and troubleshooting. Users can access the documentation on the official website or by clicking on the “Help” button in the Lens Kubernetes for Windows interface.
Forums
The Lens Kubernetes for Windows community hosts several forums where users can ask questions, share knowledge, and connect with other users. The forums are monitored by the development team and other experienced users, ensuring that questions are answered promptly and accurately.
GitHub Repository
The Lens Kubernetes for Windows GitHub repository is a valuable resource for users who want to contribute to the project or report bugs. Users can submit issues, request features, and view the source code on the repository.
Tips for Asking Questions
When asking questions or reporting bugs, users should provide as much detail as possible, including the version of Lens Kubernetes for Windows they are using, the operating system, and any relevant error messages or logs. Users should also search the forums and documentation for similar issues before posting a new question.
Contributing to the Project
Users who want to contribute to the Lens Kubernetes for Windows project can do so by submitting pull requests, reporting bugs, or providing feedback on new features. Contributions are welcome from users of all skill levels, and the development team is always looking for ways to improve the software.
By utilizing these resources, users can ensure that they are getting the most out of Lens Kubernetes for Windows and contributing to the development of the software.