What is the Azure Module in PowerShell?
The Azure Module in PowerShell is a powerful tool that enables users to manage Azure resources directly from their PowerShell console. This module provides a set of cmdlets that allow users to perform various tasks, such as creating and deleting Azure resources, monitoring resource performance, and automating repetitive tasks. By using the Azure Module in PowerShell, users can save time, reduce errors, and increase efficiency in managing their Azure environments.

Why Install the Azure Module in PowerShell?
There are several compelling reasons why users should install the Azure Module in PowerShell. First and foremost, it enables users to automate various Azure tasks, such as creating and deleting resources, monitoring performance, and managing access controls. By automating these tasks, users can save time, reduce errors, and increase efficiency. Secondly, the Azure Module in PowerShell provides a consistent and integrated experience for managing Azure resources. It allows users to manage their Azure resources using the same tools and techniques they use to manage their on-premises resources. This consistency and integration can help users streamline their workflows and improve their productivity.
Finally, the Azure Module in PowerShell integrates with other Microsoft tools, such as Azure DevOps, Azure Monitor, and Azure Logic Apps. By integrating with these tools, users can create end-to-end solutions that span their entire development and operations lifecycle. This integration can help users improve their agility, reduce their time to market, and increase their competitiveness.
Preparing Your Environment: Prerequisites for Installing the Azure Module
Before installing the Azure Module in PowerShell, users should ensure that their environment meets the necessary prerequisites. First and foremost, users should ensure that they have a compatible version of PowerShell installed on their system. As of this writing, the Azure Module requires PowerShell version 5.1 or later. Additionally, users should ensure that their operating system is compatible with the Azure Module. The Azure Module is supported on Windows, macOS, and Linux operating systems. However, some features may not be available on all platforms.
Finally, users should ensure that they have the necessary software and dependencies installed on their system. For example, users may need to install the Azure CLI or Azure AD PowerShell modules, depending on their specific use case. It is recommended that users consult the official Azure documentation for a complete list of prerequisites and dependencies.
Step-by-Step Guide: Installing the Azure Module in PowerShell
To install the Azure Module in PowerShell, users can follow these simple steps:
Open PowerShell with administrative privileges. This can be done by searching for “PowerShell” in the Start menu, right-clicking on the “Windows PowerShell” result, and selecting “Run as administrator.”
Once PowerShell is open, users should ensure that their system is up to date by running the following command: Update-Module -Name PowerShellGet -Force
After the system is updated, users can install the Azure Module by running the following command: Install-Module -Name Az -AllowClobber -Scope CurrentUser
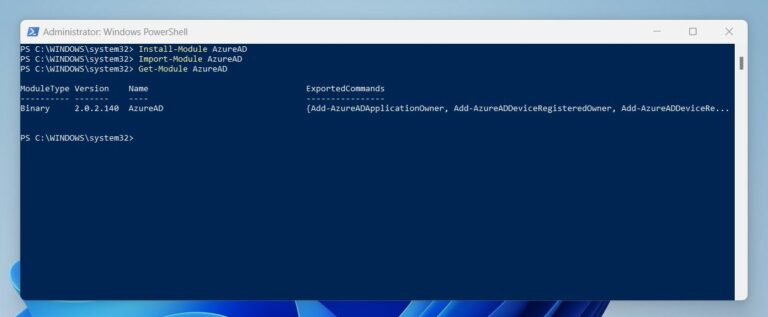
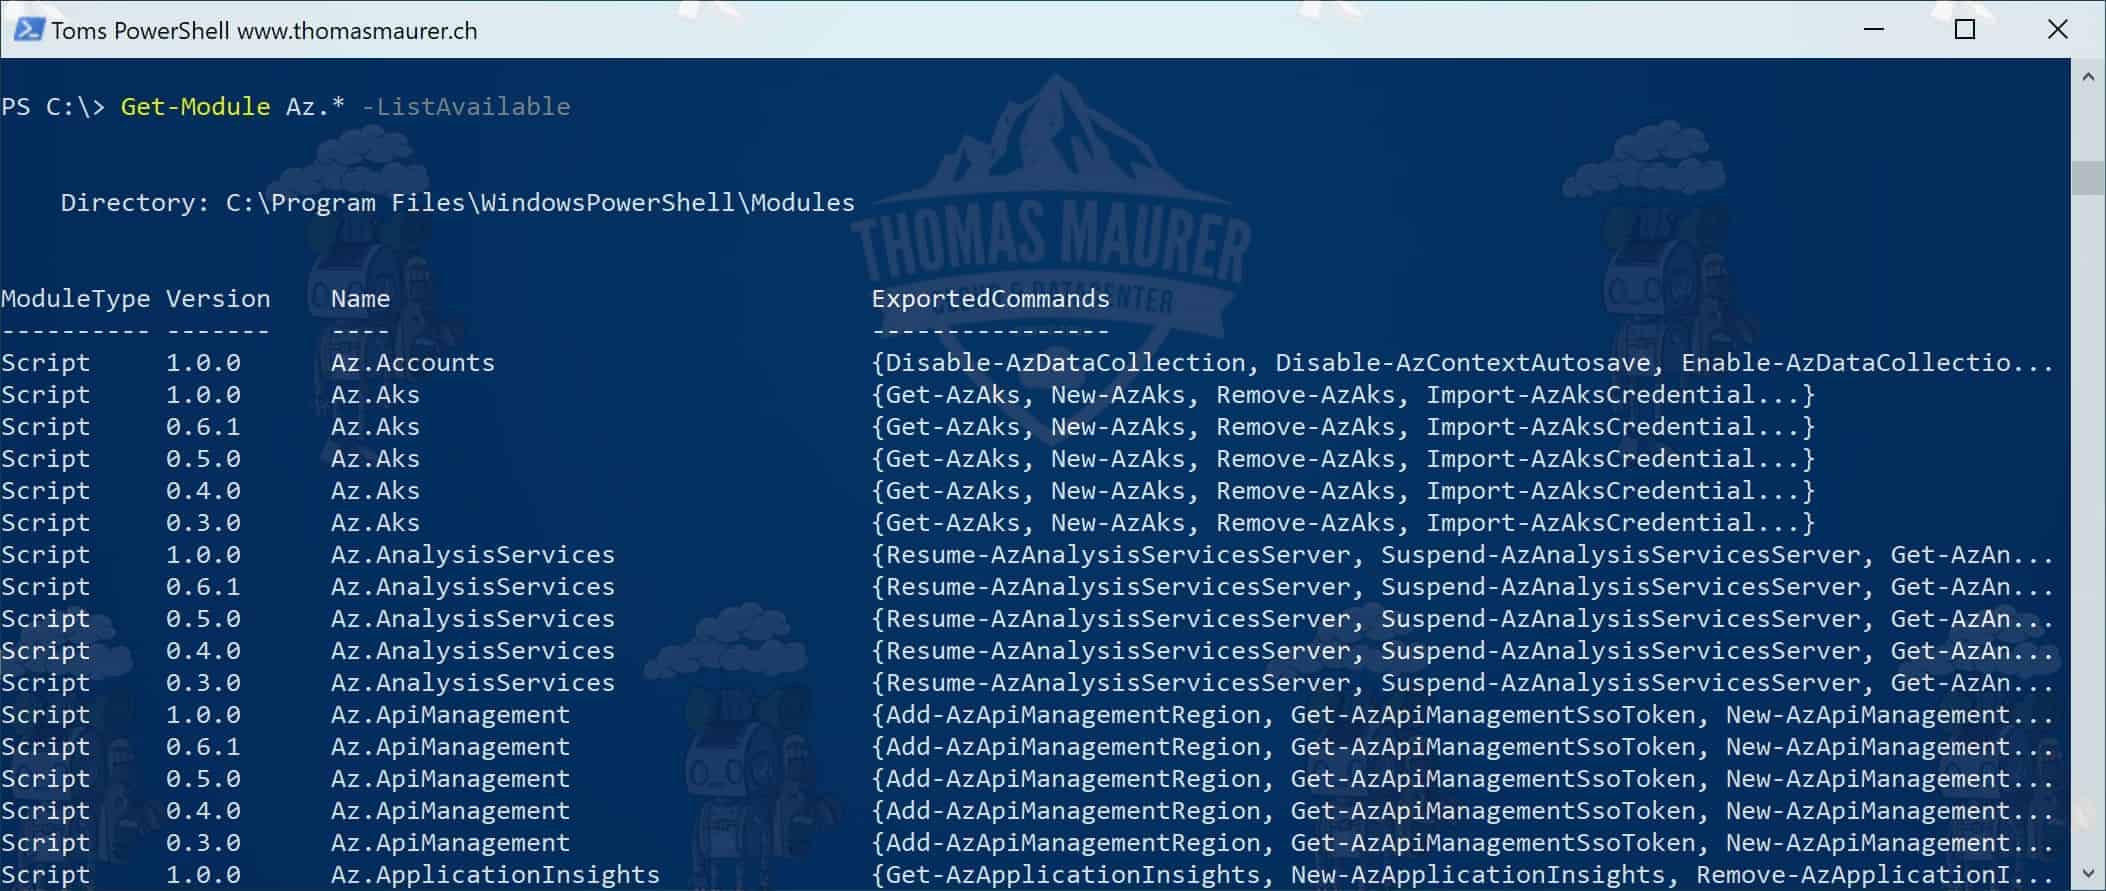
The installation process may take several minutes to complete, depending on the user’s internet connection speed. Once the installation is complete, users can verify that the Azure Module is installed by running the following command: Get-Module -Name Az -ListAvailable
If the Azure Module is installed correctly, users should see a list of available cmdlets and their versions. If the installation fails, users should check for any potential error messages and troubleshoot any issues as necessary.
It is important to note that some users may encounter issues with permission or network connectivity during the installation process. In such cases, users should consult the official Azure documentation or seek assistance from the Microsoft community forums.
Verifying the Installation: Checking if the Azure Module is Properly Installed
After installing the Azure Module in PowerShell, users should verify that the installation was successful and that the module is properly configured. To do this, users can run the following command in PowerShell: Get-Module -Name Az -ListAvailable If the Azure Module is installed correctly, users should see a list of available cmdlets and their versions. If the module is not installed, users will see a message indicating that the module was not found.
Additionally, users can test the Azure Module by running a simple cmdlet, such as Get-AzResource. This cmdlet retrieves a list of Azure resources in the user’s subscription. If the cmdlet runs successfully, users can be confident that the Azure Module is properly installed and configured.
It is important to note that users may encounter issues with permission or network connectivity when attempting to use the Azure Module. In such cases, users should consult the official Azure documentation or seek assistance from the Microsoft community forums.

Troubleshooting Common Installation Issues
While installing the Azure Module in PowerShell is generally a straightforward process, users may encounter common issues that can be easily troubleshot. Here are some of the most common installation issues and how to resolve them:
- Permission errors: If users encounter permission errors when attempting to install the Azure Module, they may need to run PowerShell as an administrator. To do this, right-click on the PowerShell icon and select “Run as administrator.”
- Network connectivity issues: If users are unable to connect to the internet or the Azure repository, they may need to check their network settings or firewall configurations. Ensure that the necessary ports are open and that there are no network restrictions that may be preventing the installation from completing.
- Version compatibility problems: If users encounter version compatibility problems, they may need to update their version of PowerShell or their operating system. The Azure Module requires PowerShell version 5.1 or later, and may not be compatible with older versions of the operating system.
If users are unable to resolve these common issues, they should consult the official Azure documentation or seek assistance from the Microsoft community forums. The Microsoft community is a valuable resource for users who need help troubleshooting issues or who have questions about using the Azure Module in PowerShell.

Additional Resources: Learning More About the Azure Module in PowerShell
If you’re interested in learning more about the Azure Module in PowerShell, there are several resources available to help you get started. Here are some of the most valuable resources for users who want to learn more about the Azure Module and how to use it effectively:
- Official Documentation: The official Azure documentation is a comprehensive resource that covers all aspects of the Azure platform, including the Azure Module in PowerShell. The documentation includes detailed guides, tutorials, and reference materials that can help users get started with the Azure Module and use it effectively. You can access the official Azure documentation at https://docs.microsoft.com/en-us/azure/.
- Tutorials: Microsoft offers a wide range of tutorials and learning paths that can help users get started with the Azure Module in PowerShell. These tutorials cover a variety of topics, from basic cmdlet usage to advanced automation techniques. You can access these tutorials at https://docs.microsoft.com/en-us/learn/browse/?products=azure-powershell.
- Community Forums: The Microsoft community forums are a valuable resource for users who need help troubleshooting issues or who have questions about using the Azure Module in PowerShell. The forums are monitored by Microsoft support staff and community experts, and users can ask questions, share knowledge, and connect with other users who are interested in Azure and PowerShell. You can access the community forums at https://social.technet.microsoft.com/Forums/en-US/home.
By taking advantage of these resources, users can learn more about the Azure Module in PowerShell, improve their skills, and become more efficient and effective Azure administrators.
Conclusion: Getting Started with the Azure Module in PowerShell
In this article, we’ve covered everything you need to know to get started with the Azure Module in PowerShell. From understanding what the Azure Module is and why you should install it, to preparing your environment, following a step-by-step installation guide, verifying the installation, troubleshooting common issues, and accessing additional resources, we’ve provided a comprehensive guide to help you manage your Azure resources more efficiently.
By installing the Azure Module in PowerShell, you’ll be able to automate Azure tasks, manage Azure resources, and integrate with other Microsoft tools. With the power of PowerShell and Azure at your fingertips, you’ll be able to streamline your workflows, reduce errors, and save time. Plus, with access to official documentation, tutorials, and community forums, you’ll be able to continue learning and improving your skills over time.
So what are you waiting for? Get started with the Azure Module in PowerShell today and take your Azure administration to the next level!